
User's Manual


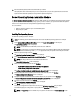
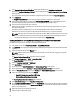
Table Of Contents
- Dell Systems Build And Update Utility Version 2.2 User's Guide
- About Dell OpenManage Systems Build And Update Utility
- Launching SBUU
- Using SBUU In Different Scenarios
- Deploying Your Current Bare-Metal Dell System
- Deploying More Than One System With The Same Configuration
- Deploying More Than One System With Slightly Different Configurations
- Deploying Multiple Systems Of Different Models
- Deploying Multiple Systems With The Same Configuration And Different Operating Systems
- Reusing Configuration Files
- Creating Bootable USB
- Creating an ISO image
- Frequently Asked Questions

Updating Your System Firmware
1. On the Dell Systems Build and Update Utility Home screen, click Firmware Update on the left pane.
The Repository Selection screen is displayed.
2. Specify the location where the update files repository resides. The options available are:
– NFS Share
– SMB Share
– CD/DVD Media
– USB
NOTE: To compare your system component status with a different version of the Server Update Utility, provide
the location of the Server Update Utility on the Repository Selection screen.
If you select NFS, enter the IP Address/Hostname and Network Share details.
If you select SMB, enter the IP Address/Hostname, Network Share, User Name, and Password details.
3. Click Continue.
The comparison report is displayed on the Comparison Report screen.
If the media is unavailable the following error message appears:
Unable to recognize the media. It may be blank, damaged, or the format is
not supported.
4. Click OK and insert the media.
5. Click Continue.
NOTE: You can selectively upgrade components depending on your requirement. However, you cannot
perform selective downgrades.
6. Select any components that you want to upgrade and click Systems Build and Update Utility Home.
NOTE: SBUU saves the information about the repository and the selections you made on the Comparison
Report screen. These updates are applied during the actual deployment.
7. To update your current system, click Apply/Export Configuration.
The Configure Apply/Export Options screen is displayed.
8. Select Apply Configuration to Current System and click Apply/Export.
The progress bar is displayed after which your system reboots with the firmware updates configured.
Hardware Configuration Module
The Hardware Configuration module in SBUU enables you to configure your system’s BMC, DRAC, RAID, and BIOS.
Once you save the configuration settings, you can use the tool to generate the .ini file and apply these configuration
settings across multiple systems.
NOTE: FQDN feature is available on Dell PowerEdge yx2x (12G) and later systems. On systems prior to 12G, provide
a valid IP address in the text box.
Configuring Your System Hardware On Your Current System
1. On the Systems Build and Update Utility Home screen, click Hardware Configuration on the left pane.
7