
User's Manual


Using The Systems Build and Update Utility 29
5
The
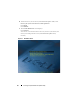
Configure Apply/Export Options
screen displays.
6
You can export the hardware configuration for later use (select
Export
Configuration
). The
Apply Configuration to Current System
is selected
by default.
Click
Apply/Export
.
7
The configuration you saved in step 3 will now apply to your system and
the progress bar displays. After the configuration is applied, your system
reboots automatically. Your system is ready with the updated
configuration.
For Multiple Systems
1
On the
Systems Build and Update Utility Home
, click
Change
against
System(s) Selection
on the left-hand pane. The
Select System(s)
screen
displays.
NOTE: To generate a bootable ISO image to deploy multiple systems, you must
select the required system on the Select System(s) screen. This is true even when
you want to deploy multiple systems that are the same model as your current
system on which you are running Systems Build and Update Utility.
2
Select the system(s) per your requirement. Click
Save Settings
.
3
You are taken to the
Systems Build and Update Utility Home
. The list
under
System(s) Selection
is now populated with the systems selected
above.
4
On the
Systems Build and Update Utility Home
, click
Configure
against
Hardware Configuration
or click
Hardware Configuration
on the left-
hand pane.
5
After you configure fields on each component screen, ensure that you click
Save Settings
before you navigate away from the screen.
Once you complete this process, go back to the
Systems Build and Update
Utility Home.
6
Click
Apply/Export Configuration
.
7
The
Configure Apply/Export Options
screen displays.