Dell™ Systems Build and Update Utility 1.1 User’s Guide w w w. d e l l . c o m | s u p p o r t . d e l l .
Notes and Cautions NOTE: A NOTE indicates important information that helps you make better use of your computer. CAUTION: A CAUTION indicates potential damage to hardware or loss of data if instructions are not followed. ___________________ Information in this document is subject to change without notice. © 2008 Dell Inc. All rights reserved. Reproduction of these materials in any manner without the written permission of Dell Inc. is strictly forbidden.
Contents 1 About This Document . . . . . . . . . . . . . . . . Who Should Read This Document? . . . . . . . . . . . . 7 . . . . . . . . . . . 7 . . . . . . . . . . . . . . 7 How Will This Document Help Me? How Do I Use This Document? 2 Dell Systems Build and Update Utility Overview What Is The Systems Build and Update Utility? . . . . . . . . . . . . . . . . . . . . . . 11 . . . . . . . . . . . . . 11 What Are The Key Features? Overview of Functionalities 3 7 . . . . . . . . . . .
5 Launching the Systems Build and Update Utility . . . . . . . . . . . . . . . . . . 21 Using The Systems Build and Update Utility . . . . . . . . . . . . . . . . . . . . . 25 . . . . . . . . . . . 25 Flexibility That Systems Build and Update Utility Offers . . . . . . . . Using The Systems Build and Update Utility In Different Scenarios . . . . . . . . . . . . . . 27 Updating Your System Firmware . . . . . . . . . . 27 . . . . . . . . 28 . . . . . . . . . . . . 30 . . . . . . . . . .
Hardware Configuration . . . . . . . . . . . . . . . . . . . . . . . . . 48 . . . . . . . . . . . . . . . 48 Server Operating System Installation . Important Information Frequently Asked Questions Update Utility Creation . . . . . . . . . . . . 49 . . . . . . . . . . . . . . . . . 50 Important Information . . . . . . . . . . . . . . . 50 . . . . . . . . . . . . 50 . . . . . . . . . . . . . . . . . . . . 51 Frequently Asked Questions Content Manager 46 Important Information . . . . . . .
Contents
About This Document It is strongly recommended that you read this section, "Dell Systems Build and Update Utility Overview," and "Before You Begin Using The Dell Systems Build and Update Utility" before proceeding further. Who Should Read This Document? This document is for system administrators who are responsible for deploying and updating Dell™ PowerEdge™ systems in their organizations.
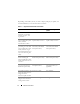
Depending on the Dell systems you want to deploy, redeploy or update, it is recommended that you use the document as follows. Table 1-1.
Table 1-1.
About This Document
Dell Systems Build and Update Utility Overview This section provides an overview of the Dell™ Systems Build and Update Utility. This section helps you to understand the functionalities that the Dell Systems Build and Update Utility provides to update and deploy your Dell systems. What Is The Systems Build and Update Utility? The Dell Systems Build Update and Utility is an integrated tool for deployment and update of your Dell systems.
• You can create customized bootable media to deploy multiple systems (different platforms) of your choice. • You can easily deploy your newly purchased Dell systems for which you had already created a bootable media. This is possible because of the multisystem configuration file (.csv file) that you must create and save in a centralized network location.
Table 2-1. Dell Systems Build and Update Utility Functionalities (continued) You Want To Go To For Customize the Server Update Utility and use it to update your Dell system one-to-one (requires an operating system on your system). "Using Systems Build Dell systems (excluding and Update Utility After PowerEdge SC systems) Operating System Installation" Download the latest Server "Using Systems Build Update Utility ISO image from and Update Utility After Dell online at ftp.dell.com.
Dell Systems Build and Update Utility Overview
Before You Begin Using The Dell Systems Build and Update Utility This section lists the prerequisites you require before proceeding to use Dell™ Systems Build and Update Utility and where to get other information that you may need while using this utility. Prerequisites And Requirements You should have a Dell system with: • Minimum memory of 512 MB • CD drive or DVD drive Table 3-1 lists the prerequisites and requirements for Dell Systems Build and Update Utility.
Table 3-1. Prerequisites And Requirements Module Prerequisites And Requirements Generic Prerequisites And Requirements • To make effective use of Systems Build and Update Utility, you will need at least two multiple network shares (either Network File System [NFS] or Samba. If you do not have network connectivity for the system you are deploying, ensure that you have multiple USB keys.
Table 3-1. Prerequisites And Requirements (continued) Module Prerequisites And Requirements Server Operating System Installation • Operating system media; or, a network share or a USB key on which to save the operating system ISO image. • Dell Systems Management Tools and Documentation DVD (if you want to install Dell OpenManage™ System Administrator). This is not applicable for Dell PowerEdge™ SC systems.
Supported Systems For the list of Dell systems supported for this version of the Dell Systems Build and Update Utility, see the readme.txt in the root folder or the Dell Systems Software Support Matrix on the Dell Support website at support.dell.com or the Dell Systems Management Tools and Documentation DVD.
• The Integrated Dell Remote Access Controller User’s Guide provides information about installation, configuration, and maintenance of the Integrated Dell Remote Access Controller (iDRAC) on management and managed systems. • The Dell Remote Access Controller/Modular Chassis User's Guide provides information about installation, configuration, and maintenance of the Dell Remote Access Controller/Modular Chassis (DRAC/MC).
Before You Begin Using The Dell Systems Build and Update Utility
Launching the Systems Build and Update Utility To launch the Dell™ Systems Build and Update Utility: 1 Insert the Dell Systems Management Tools and Documentation DVD in your system drive. 2 Reboot your system. The boot menu screen displays. Figure 4-1 shows the boot menu screen. Alternately, you can launch the Systems Build and Update Utility on a remote system as follows: 1 On your client system, access the Dell Remote Access Controller (DRAC) 4 or DRAC 5 GUI. 2 Click the Media tab.
6 To boot the host system to the Systems Build and Update media, select Power Cycle System under Power Control Operations. Click Apply. Click Console. 7 The Console Redirection screen displays. Click Connect. You can now access the boot menu screen on your host system from your client system and proceed to use Systems Build and Update Utility remotely. Figure 4-1.
Table 4-1 lists the options and their descriptions available on this screen. Table 4-1. Boot Menu Options Boot Menu Option Does This For You Dell Systems Build and Takes you to the Dell Systems Build and Update Utility Update Utility Home screen. Optical Media (CD/DVD) Check Checks if the Dell Systems Management Tools and Documentation DVD you inserted has any errors. Skip Optical Media Enables you to boot from your system hard drive.
Launching the Systems Build and Update Utility
Using The Systems Build and Update Utility This section describes the flexibility that Systems Build and Update Utility offers to deploy and update your systems and also the various scenarios in which you can use the Dell™ Systems Build and Update Utility. However, this section does not cover all the possible update and deployment scenarios in which you can use the Systems Build and Update Utility.
• Choice of configuring systems: The Apply/Export Configuration feature in Systems Build and Update Utility allows you to deploy and update your current system and/or multiple systems or multiple systems of different models.
Using The Systems Build and Update Utility In Different Scenarios This subsection describes some of the possible scenarios in which you can use the Systems Build and Update Utility. These scenarios are meant to give you an idea on how to effectively use the Systems Build and Update Utility. They are not necessarily the only way to use this tool nor are these the only scenarios in which you can use this tool.
5 If all components on your system are up-to-date, no action is required. If you want to compare your system component status with respect to a different version of the Server Update Utility, click Back. Provide the location of the Server Update Utility on the Repository Selection screen and click Continue. If there are components to be updated, select the required components and click Go Back to Home Page.
5 The Configure Apply/Export Options screen displays. 6 You can export the hardware configuration for later use (select Export Configuration). The Apply Configuration to Current System is selected by default. Click Apply/Export. 7 The configuration you saved in step 3 will now apply to your system and the progress bar displays. After the configuration is applied, your system reboots automatically. Your system is ready with the updated configuration.
8 You can export the hardware configuration for later use (select Export Configuration). Select Create Auto-Deployment Bootable Image and click Destination to provide the location where you want to save the bootable ISO image. The ISO Save Location screen displays. (If you choose to save the ISO image to a USB key and select the option to make the USB key bootable, you can skip the step to burn the CD/DVD.) Click Continue.
6 The Network Adapter(s) Configuration screen displays. Enter the appropriate information about the network adapters on your system. Click Continue. 7 The Enter Configuration Information for Microsoft Windows 2003 Server Service Pack 2 screen displays (based on the operating system you chose in step 3). Fill in the appropriate fields and click Continue. 8 The Operating System Installation Summary screen displays. You can change your configuration settings until this point by clicking Back.
Deploying Your Current ("Bare-Metal") Dell System In this scenario, you can update and deploy your current system.
1 To update your system firmware, click Configure against Firmware Update on the Dell Systems Build and Update Utility Home screen, or click Firmware Update on the left-hand pane. For details on the Firmware Update, see "Firmware Update." For details on how to use the Firmware Update, see step 1 through step 5 under "Updating Your System Firmware").
7 The Configure Apply/Export Options screen displays. Provide your inputs as required and click Continue. NOTE: You can choose to configure the multisystem configuration file, so that system settings will be taken from this file. (See Table 3-1 for details on the multisystem configuration file.) NOTE: If the Exit on Failure option is checked, any failure during a module update will cause Systems Build and Update Utility to exit.
1 On the Systems Build and Update Utility Home, click Change against System(s) Selection on the left-hand pane. The Select System(s) screen displays. NOTE: Ensure that you click Select Systems before proceeding to the next step. Else, the option to save the ISO image (Create Auto-deployment Bootable Image) will not be enabled on the Select Options screen. 2 Click PowerEdge R710 from the Supported Systems list (for this example) and click on the right arrow.
3 Click Save Settings and return to the Systems Build and Update Utility Home. 4 To configure the Systems Build and Update Utility modules, follow step 1 through step 5 (under "Deploying Your Current ("Bare-Metal") Dell System"). 5 On the Systems Build and Update Utility Home, click Apply/Export Configuration. 6 The Configure Apply/Export Options screen displays. 7 Select the Create Auto-deployment Bootable Image option and click Destination to specify the location where you want to save the ISO image.
• the number of disks must be the same or more. • the disk sizes are the same or more. • the available disks must be of the same type – a mix of SAS, small computer system interface (SCSI), and Solid State Disk (SSD) will not be supported. Once the above criteria are satisfied, you can follow step 1 through step 11 (under "Deploying More Than One System With the Same Configuration") to update and deploy more than one system with slightly different configuration.
Deploying Multiple Systems With The Same Configuration For Different Operating Systems In this scenario, you can update and deploy multiple systems with the same configuration for different operating systems; for example, you have 100 PowerEdge R710 systems. You want to deploy 25 systems with Microsoft® Windows® Server 2003 operating system, 50 systems with Red Hat® Enterprise Linux® 5.2 operating system, and 25 systems with Windows Server ®2008 operating system.
1 Let us say you choose to first create a bootable media to deploy Windows Server 2003 operating system. Follow step 1 through step 11 to create the bootable image for Windows Server 2003 operating system. (Ensure that you select Windows Server 2003 on the Select an Operating System to Install screen in the SOI module.
Important! • Once you import the configuration file, all the GUI fields will be populated. • You can edit the Firmware Update Configuration, Hardware Configuration, and Configure SOI modules as required. However, ensure that you do not make any changes on the System(s) Selection screen; if you do so, all existing configuration for the three modules will be reset. 1 On the Systems Build and Update Utility Home, click Import Saved Configuration. 2 The Import Configuration screen displays.
4 Click Systems Build and Update Utility Home. 5 You can edit the existing configuration for the Firmware Update, Hardware Configuration, and SOI modules; then, you can create the ISO image for this configuration. (Follow step 4 through step 11 under "Deploying More Than One System With the Same Configuration" ).
Creating The Customized Repository Using Content Manager 1 On the Select an Operation to Perform screen, select Create Custom Server Update Utility. Click Next. 2 The Select Source and Destination screen displays. If you want to customize the Dell Server Updates DVD, select the DVD as the source (under Select Server Update Utility Source). Else, select Dell Online Website as the source. Under Proxy Settings, specify the proxy settings to connect to the Dell online website.
Getting Server Update Utility Application Using Content Manager 1 From the Select an Operation to Perform screen, select Download Server Update Utility ISO image and click Next. 2 The Select Source and Destination screen displays. Under Select Download Source, select Dell Online Website to download the ISO image from ftp.dell.com. Under Proxy Settings, specify the proxy settings to connect to the Dell online website.
Comparing Local Repository with the Dell Online Repository Using Content Manager 1 From the Select an Operation to Perform screen, select Check for Server Update Utility Updates and click Next. 2 The Select Source and Destination screen displays. Under Select Update Source, select Dell Online Website if your source repository content is on the Dell online website. Under Proxy Settings, specify the proxy settings to connect to the Dell online website.
Important Information and Frequently Asked Questions This section contains important information about the different modules in the Dell™ Systems Build and Update Utility, including answers to some frequently asked questions. Firmware Update Important Information The Firmware Update module in the Systems Build and Update Utility enables you to update the BIOS and firmware versions of your Dell systems in a pre-operating system environment.
Q: What should I do if I face any prerequisite failure during the update process? A: If you face any prerequisite failure during the update process, see the Server Update Utility User's Guide on how to rectify this. Q: I want to use my custom repository for firmware updates using the Dell Systems Build and Update Utility. A: If you want to use your custom repository for firmware updates using the Dell Systems Build and Update Utility, you will need a Linux repository.
Frequently Asked Questions Q: How do I access the command line interface? A: To access the command line interface: From the boot menu, select DTK Command Line Interface (Linux). Q: How do I know which components to configure? A: Table 6-1 lists the components you can configure depending on your Dell system. NOTE: This list is not exhaustive and is only meant as a cheat sheet for your reference. Table 6-1.
Q: When setting the boot sequence for devices, what happens if I choose a device that is not on my system? A: The configuration utility selects the boot devices in the sequence that you specify for boot order. However, if you choose a device that is not present on your system, the utility ignores the device, selects the remaining boot devices, and lists them based on the specified order.
Frequently Asked Questions Q: What happens if I install a new operating system on my system that already has an operating system? A: If you already have an operating system on your system (that is, if you are "repurposing" your system), and you use the SOI to install a different operating system, the existing operating system will be removed and data will be deleted from your system. Q: Can I install Microsoft® Windows Server® 2008 and VMware® ESX Server™ operating systems? A: Yes, you can.
Update Utility Creation Important Information The Dell Server Updates DVD contains a repository which includes update packages for supported Dell systems for Microsoft® Windows® and Linux operating systems. The Update Utility Creation module in the Dell Systems Build and Update Utility enables you to customize and create a smaller and more compact update utility repository by selecting only the systems and operating systems you require.
The source repository can be the Dell Server Updates DVD or the contents you copy to a network share. You can also download the Dell Server Updates DVD from Dell online using Content Manager. To know more about the Content Manager, see "Content Manager." NOTE: If you are using a USB key or a network location to save a copy of the Dell Server Updates DVD, make sure you copy all the contents, including all the folders in the same directory structure.
• • save your customized repository on a local or shared location and use it later for system hardware updates in a pre-operating system or postoperating system environments. check for the latest updates by comparing your local or customized repository with the Dell online repository at ftp.dell.com. Frequently Asked Questions Q: How will checking for repository updates help me? A: By using the Check for Server Update Utility Updates operation, you get a detailed report on driver and firmware updates.
Glossary BIOS Acronym for basic input/output system. Your system's BIOS contains programs stored on a flash memory chip. The BIOS controls the following: • Communications between the microprocessor and peripheral devices, such as the keyboard and the video adapter • Miscellaneous functions, such as system messages BMC Abbreviation for baseboard management controller, which is the controller interface between the DRAC and the managed system’s embedded systems management (ESM).
USB Abbreviation for Universal Serial Bus. A USB connector provides a single connection point for multiple USB-compliant devices, such as mice, keyboards, printers, and computer speakers. USB devices can also be connected and disconnected while the system is running. utility partition A bootable partition on the hard drive that provides utilities and diagnostics for your hardware and software. When activated, the partition boots and provides an executable environment for the partition's utilities.
Index A Accessing Update Utility Creation, 50 B Boot Menu accessing, 21 options, 23 Deploying More Than One System With Slightly Different Configuration, 36 Deploying Multiple Systems of Different Models, 37 Deploying Multiple Systems With The Same Configuration For Different Operating Systems, 38 C F Configuring System Hardware current system, 28 multiple systems, 29 Firmware Update FAQs, 45 Content Manager accessing, 41 comparing local repository with Dell online repository using, 44 creating custo
L Launching Systems Build and Update Utility from DVD, 21 from virtual system using DRAC, 21 M Multisystem Configuration File, 16 P Prerequisites Firmware Update, 17 Generic, 16 Hardware Configuration, 17 Server Operating System Installation, 17 Update Utility Creation, 17 Product overview functionalities, 12 R Reusing Configuration Files, 39 S Server Operating System Installation (SOI) FAQs, 49 uses, 48 56 Index Source Repository what is, 51 Systems Build and Update Utility flexibility, advantages, 2