
Quick Start Manual


Using GUI For Windows Operating System
To permanently install DSET application on Windows operating system:
1. Run the Dell_DSET_(Version Number).exe file.
The Welcome to the Dell System E-Support Tool (3.5.1) Installation Wizard window is displayed.
2. Click Next.
The License Agreement is displayed.
3. Select I accept the license agreement and click Next.
The Installation Type window is displayed.
4. Select Install DSET and click Next.
The Select Installation Type window is displayed.
5. Select one of the following options and click Next:
– DSET and Remote Provider (Recommended)
– DSET
– Remote Provider
The Destination Folder window is displayed.
6. Click Browse and select the folder to install the DSET application or use the default location and click Next.
The User Information window is displayed.
NOTE: The default location for Windows (x86) systems is <system drive>:\Program Files\Dell and for Windows
(x86_64) systems is <system drive>:\Program Files (x86)\Dell
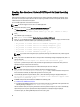
7. Enter the following:
– Full Name — Enter your full name.
– Organization — Enter your organization information.
8. Click Next.
The Ready to Install the Application window is displayed.
9. Click Next.
The Updating System window is displayed indicating the installation status.
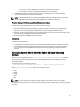
10. To generate the report and/or upload (optional step) :
– Run and Collect DSET Report — Select this option to generate the report.
– Automatically Upload the Report to Dell — This option is enabled when Run and Collect DSET Report option is
selected. Select this option to upload the report to the Dell Technical Support when requested.
11. Click Finish to close the installer.
DSET application is now installed in the local system and if you have performed step 11, the report is also
generated and/or uploaded.
For more information, see
Using DSET Application
section in the user's guide.
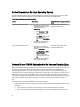
Using CLI For Windows Operating System
To install DSET application, run the following command:
• Dell_DSET_(version number).exe — This invokes the GUI.
12