Dell SupportAssist Version 1.2.
Notes, Cautions, and Warnings NOTE: A NOTE indicates important information that helps you make better use of your computer. CAUTION: A CAUTION indicates either potential damage to hardware or loss of data and tells you how to avoid the problem. WARNING: A WARNING indicates a potential for property damage, personal injury, or death. © 2013 Dell Inc. All Rights Reserved.
Introduction Dell SupportAssist plugin for Dell OpenManage Essentials provides proactive support capabilities for supported Dell server, storage, and networking solutions. OpenManage Essentials interacts with supported devices that are to be monitored and receives SNMP traps. The SNMP traps are periodically retrieved as alerts by the SupportAssist client. The alerts are filtered using various policies to decide if the alerts qualify for creating a new support case or updating an existing support case.
NOTE: In SupportAssist version 1.1.1, the PowerEdge VRTX device is displayed as an iDRAC7 device. After upgrading SupportAssist from version 1.1.1 to 1.2.1, the PowerEdge VRTX device continues to display as an iDRAC7 device. To make sure that the PowerEdge VRTX device is displayed as expected after the upgrade, in OpenManage Essentials, remove the PowerEdge VRTX device and discover it again. 8. Verify that SupportAssist is able to generate the system log collection and upload it to Dell successfully.
6. Click the Traps tab, and perform the following: a) In the Community name box, type the community name, and click Add to list. b) Under Trap destinations, click Add. The SNMP Service Configuration dialog box is displayed. c) In the Host name, IP or IPX address field, type the OpenManage Essentials server name or address, and click Add. 7. Click Apply. 8. In the Service window, right-click SNMP Service and click Restart. NOTE: The default port for sending SNMP traps is 162.
NOTE: The Settings tab is accessible only if you are logged on as a member of the OpenManage Essentials Administrators or Power Users group. 1. Click the Settings tab. 2. Under Edit Device Type Credentials, select the Device Type and Credential Type. 3. Type the Administrator credentials [Username, Password, Enable Password (for Ethernet switches only), and Community String (for Dell EqualLogic devices only)] of the selected Device Type and Credential Type in the corresponding fields.
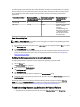
The following table provides information about network bandwidth consumption and recommendations for scheduling periodic collections in an environment that consists of 75 percent servers and 25 percent switch and storage devices. The recommendations also assume compliance with the hardware, software, and networking requirements for SupportAssist.
– • Make sure that the default credentials for the device are configured correctly in the Settings → System Logs tab. To edit the credentials for the device, select the device in the Device Inventory, and click Edit Device Credentials. If the upload of the system log collection fails for a device (Collection Status displays Collection Failed to Upload): – Make sure that the proxy server credentials are configured correctly in the Settings → Proxy Settings page in SupportAssist.
5. Click View certificates. The Certificate window is displayed. 6. Click Details. 7. Click Copy to File. The Certificate Export Wizard is displayed. 8. Click Next. 9. In the Export File Format page, click Next. 10. In the File to Export page, click Browse. The Save As window is displayed. 11. Navigate to the location you want to save the certificate file. 12. Type a file name and click Save. 13. In the Export File Format page, click Next. 14. Click Finish. The status of the export is displayed.
The File to Import dialog box is displayed. 13. Browse to select the certificate file you exported, and click Next. The Certificate Store information is displayed. 14. Click Next. 15. Click Finish. 16. Right-click Intermediate Certification Authorities → All Tasks → Import. The Certificate Import Wizard is displayed. 17. Browse to select the certificate file you exported, and click Next. The Certificate Store information is displayed. 18. Click Next. 19. Click Finish. 20.