
Users Guide

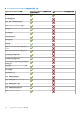


Table Of Contents
- SupportAssist Enterprise 版本 2.0.70 用户指南
- 目录
- 概览
- SupportAssist Enterprise 使用入门
- 在本地系统上设置 SupportAssist Enterprise
- 为远程设备设置 SupportAssist Enterprise
- 评估 SupportAssist Enterprise
- 下载 SupportAssist Enterprise 安装程序包
- 安装或升级 SupportAssist Enterprise
- 安装和使用 SupportAssist Enterprise 的最低要求
- 安装 SupportAssist Enterprise
- 升级 SupportAssist Enterprise
- 迁移到 SupportAssist Enterprise
- 无需注册,即可使用 SupportAssist Enterprise
- 注册 SupportAssist Enterprise
- 设置启用了 SELinux 的系统以接收警报
- 打开 SupportAssist Enterprise 用户界面
- 登录 SupportAssist Enterprise
- 注销 SupportAssist Enterprise
- 添加设备
- 管理设备发现规则
- 查看案例和设备
- 监测站点运行状况
- 使用扩展
- 设备分组
- 管理设备凭据
- 验证设备资源清册
- 维护 SupportAssist Enterprise 功能
- 配置电子邮件通知
- 配置收集设置
- 查看收集
- 使用 SupportAssist Enterprise 收集和发送系统信息
- 了解维护模式
- SupportAssist Enterprise 用户组
- 手动配置 SNMP 设置
- 在 TechDirect 中管理 SupportAssist Enterprise 警报
- 其他有用信息
- 监测服务器是否发生硬件问题
- 支持自动安装或升级 OMSA
- 支持自动配置 SNMP 设置
- 安装 SupportAssist Enterprise 修补程序
- 启用或禁用 API 接口设置
- 登录至 TechDirect
- 深层发现
- 设备关联
- 关联视图
- 检测已连接存储设备中的硬件问题
- 支持 OEM 设备
- 在运行 Linux 的服务器上安装 Net-SNMP
- 在运行 Linux 的服务器上为 SupportAssist Enterprise 配置 sudo 访问权限
- 确保 SupportAssist Enterprise 应用程序和 SupportAssist 服务器之间的通信成功
- 访问 SupportAssist Enterprise 应用程序日志
- 事件风暴处理
- 查看 SupportAssist Enterprise 产品信息
- 卸载 SupportAssist Enterprise
- 故障排除
- 安装 SupportAssist Enterprise
- SupportAssist Enterprise 注册
- 打开 SupportAssist Enterprise 用户界面
- 登录 SupportAssist Enterprise
- 无法添加设备
- 无法添加适配器
- 无法添加 Remote Collector
- 断开连接
- 未安装 OMSA
- SNMP 未配置
- 有新版本的 OMSA 可用
- 无法配置 SNMP
- 无法验证 SNMP 配置
- 无法安装 OMSA
- 无法验证 OMSA 版本
- OMSA 不受支持
- 无法访问设备
- 无法收集系统信息
- 没有足够的存储空间来收集系统信息
- 无法导出集合
- 无法发送系统信息
- 身份验证失败
- 清除系统事件日志失败
- 维护模式
- 自动更新
- 无法编辑设备凭据
- 自动创建案例
- 计划的任务
- SupportAssist Enterprise 服务
- 无法在 Mozilla Firefox 中查看工具提示
- 其他服务
- 安全性
- 日志
- SupportAssist Enterprise 用户界面
- 错误代码附录
- SupportAssist Enterprise 资源
- 联系 Dell EMC
步骤
1. 在安装 SupportAssist Enterprise 的服务器上,浏览到 <安装 SupportAssist Enterprise 的驱动器>:\Program
Files\Dell\SupportAssist\scripts 文件夹。
2. 将该文件夹中的脚本文件 (WindowsSNMPConfig.ps1) 复制粘贴到设备上的所需位置(例如 C:\temp)。
3. 根据该设备上运行的操作系统,执行以下操作之一:
● 在 Windows Server 2012 的开始屏幕中,右键单击 Windows PowerShell 图块,然后在应用程序栏中单击 以管理员身份运
行。
● 在 Windows Server 2003、2008 或 Windows Small Business Server 2011 中,请单击开始、键入 PowerShell、右键单击
Windows PowerShell,然后单击 以管理员身份运行。
4. 在设备上相应地设置 PowerShell 执行策略。例如,键入以下命令:Set–ExecutionPolicy RemoteSigned 或 Set–
ExecutionPolicy AllSigned。
5. 使用以下语法在设备上运行该脚本文件:<script file path> –hosts <IP address of server where
SupportAssist Enterprise is installed>。例如,./WindowsSNMPConfig.ps1 –hosts 10.55.101.20。
6. 如果设备的信任发布者中未包括 Verisign,则会让您确认是否要从不受信任的发布者运行本软件。按 <R> 运行此脚本。
手动配置运行 Windows 的服务器的警报目标
您可以执行以下步骤,在运行 Microsoft Windows 的服务器上手动配置警报目标。
步骤
1. 打开命令提示符,键入 services.msc 并按 Enter 键。
此时将显示服务窗口。
2. 浏览服务列表,确保 SNMP 服务的状态显示为已启动。
3. 右键单击 SNMP 服务,然后选择属性。
将显示 SNMP 服务属性窗口。
4. 单击陷阱选项卡并执行以下操作:
a. 在社区名称框中,键入社区名称并单击添加到列表。
b. 在陷阱目标中,单击添加。
将显示 SNMP 服务配置窗口。
c. 在主机名、IP 或 IPX 地址字段中,键入安装了 SupportAssist Enterprise 的服务器的主机名或 IP 地址,然后单击添加。
5. 单击应用。
6. 在服务窗口中,右键单击 SNMP 服务,然后单击重新启动。
通过在运行 Linux 的服务器上使用脚本文件来手动配置服务器的警报目标
前提条件
● 必须在系统上安装 Net-SNMP。有关安装 Net SNMP 的信息,请参阅 在运行 Linux 的服务器上安装 Net-SNMP
● 确保您在此设备上具备根权限。
该脚本文件仅在运行以下操作系统的设备上受支持:
● Red Hat Enterprise Linux 5.5(32 位和 64 位)
● Red Hat Enterprise Linux 5.7(32 位和 64 位)
● Red Hat Enterprise Linux 5.8(32 位和 64 位)
● Red Hat Enterprise Linux 5.9(32 位和 64 位)
● Red Hat Enterprise Linux 5.10(32 位和 64 位)
● Red Hat Enterprise Linux 5.11(32 位和 64 位)
● Red Hat Enterprise Linux 6.1(64 位)
● Red Hat Enterprise Linux 6.2(64 位)
● Red Hat Enterprise Linux 6.3(64 位)
● Red Hat Enterprise Linux 6.4(64 位)
● Red Hat Enterprise Linux 6.5(64 位)
● Red Hat Enterprise Linux 6.7(64 位)
● Red Hat Enterprise Linux 6.8(64 位)
● Red Hat Enterprise Linux 7.0(64 位)
116 手动配置 SNMP 设置