
User's Manual

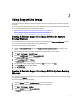


5. Click Write image file to disc.
6. Under Source, click the browse icon.
7. In the Open dialog box, browse through to select the Support Live Image (*.iso) file, and then click Open.
8. Under Destination, select the appropriate DVD drive.
9. Click the write icon that is displayed at the bottom of the dialog box.
Starting The Server
To run the diagnostic tools and gather configuration information, you must start the server using the Support Live Image
USB drive key or DVD that you created. The methods of starting a server are:
• Starting from the USB drive key or DVD. For more information, see Starting From a DVD Or an USB drive Key.
• Starting by using a virtual media. For more information, see Booting To The Virtual Drive.
Starting From a DVD Or an USB drive Key
To start from a DVD or an USB drive key:
1. Insert the Support Live Image DVD or an USB drive key in the server.
2. Turn on the server.
3. When the F11 prompt is displayed on the screen, press the <F11> key.
The BIOS Boot Manager screen is displayed.
4. Select one of the following on the basis of the device you want to boot to:
– To boot to the DVD, select Optical Drive in the menu, and then press <Enter>.
– To boot to the USB key:
1. Select Hard Drive C: in the menu.
2. In the menu that is displayed, select the appropriate USB port, and then press <Enter>.
The server boots to the Support Live Image DVD or USB key and displays the automatic boot countdown timer.
5. Press any key before the automatic boot countdown timer reaches zero (0).
The Support Live Image welcome screen is displayed with a list of options. For more information, see Boot Options.
NOTE: If you do not press any key before the countdown timer reaches 0, the Support Live Image automatically
boots to the Linux-Based Diagnostic Tools (Dell 9G–12G servers) option.
Booting To The Virtual Drive
NOTE: The method of using virtual media varies across systems, depending on the DRAC or iDRAC and the version
of the firmware. For more information, see the DRAC or iDRAC User's Guide at dell.com/support/manuals.
1. Perform one of the following as applicable:
– Mount the Support Live Image (*.iso) file to the virtual media.
– If the Support Live Image DVD or an USB drive key is available, insert the DVD or an USB drive key into the local
system, and then mount the image to the DRAC on the remote system.
2. When the F11 prompt is displayed on the screen, press <F11>.
The BIOS Boot Manager screen is displayed.
3. Select Virtual CD and press <Enter>.
The server boots to the Support Live Image on the virtual media, displays the automatic boot countdown timer.
8