
Setup Guide


Installing the Dell SPI for HPOM for Microsoft
Windows
You must close the HPOM console before you install Dell SPI.
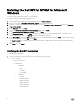
To install the Dell SPI on the HPOM management server:
1. Download the Dell SPI installer from the Dell support website at dell.com/support.
2. Extract the contents of Dell_Smart_Plug-in v4.1_Axx.exe on the management server.
3. Navigate to the directory where you have extracted the contents of Dell_Smart_Plug-in v4.1_Axx.exe and run the Dell Smart
Plug-in v4.1_x64.msi.
4. In the Welcome screen, click Next.
5. Select the I accept the terms in the license agreement option and click Next.
6. In the Documentation Availability and Location screen, click Next.
7. In the Destination Folder screen, click Next to install Dell Smart Plug-in v4.1 in the default destination. To install Dell Smart
Plug-in v4.1 in a custom folder, click Change and provide a destination folder path.
8. In the Auto Deploy screen, select Yes to auto-deploy the policy files during installation and click Next. To deploy them manually
on the management server, select
No and click Next.
The Ready to Install screen displays information about the Dell devices supported by the Dell SPI and the Dell SPI installation
location.
9. Click Install, then click Finish.
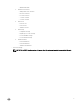
Verifying the Dell SPI installation
To verify the Dell SPI installation:
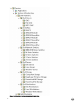
1. Launch the HPOM console and verify that the following hierarchies are created:
• Services Hierarchy
– Systems Infrastructure
* Dell Hardware
1. Dell Chassis
• CMC
• FX2 CMC
• VRTX CMC
2. Dell DRAC
• DRAC5
• iDRAC6 Modular
• iDRAC6 Monolithic
• iDRAC7 Modular
• iDRAC7 Monolithic
• iDRAC8 Modular
8