
Quick Start Manual


3. On the right pane, select OpenManage Essentials Console and right-click, and then click Properties from the pop-
up menu.
The OpenManage Essentials Console Properties window is displayed.
4. In the OpenManage Essentials Console Properties window, click the Details tab.
5. In the Command Type: (Required) drop-down list, select URL.
6. In the Command: (Required) box, enter the URL path of the OME Console.
The default URL path is https://localhost:2607/Web/Default.aspx
NOTE: OME Console will launch successfully using the default URL only if OME is installed on the same HPOM
server. If OME is installed on another server then, obtain the URL from therespective OME server where OME
is installed, and set the OME URL.
– Example: https://<IP Address Or Fully Qualified Domain Name>:2607/Web/Default.aspx
– Example: https://10.94.149.172:2607/Web/Default.aspx
– Example: https://hpom1w2k8r2.hpdom.com:2607/Web/Default.aspx
7. Click Apply.
8. Click OK.
The OME Console is configured on the HPOM Console.
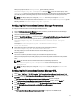
Setting The Schedule For Auto-grouping Policy
To set the schedule for auto-grouping policy:
1. Click Policy Management → Policy Groups → SPI for Dell Devices.
2. Select Dell Hardware Autogroup Policy.
3. Right-click and select All Tasks → Edit.
The Dell Hardware Autogroup Policy [3.0] (Scheduled Task) screen is displayed.
4. In the Schedule tab, select any of the options in the drop-down menu, and input the desired schedule.
5. Click Save, and Close.
NOTE: Deploy the Dell Hardware Autogroup Policy on the management server after setting the schedule. For
more information on deploying the Dell Hardware Autogroup Policy, see
Dell Smart Plug-in Version 3.0 for HP
Operations Manager 9.0 For Microsoft Windows User's Guide
.
15