
Users Guide


Appendix B
Topics:
• Creating A Simple Authentication Run As Account
•
Associating Run As Account for Monitoring a Dell Server Using the Agent-free Monitoring Feature
• Severity Level Indicators
• Associate Run As-Account task — Agent-free Monitoring Feature
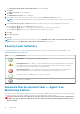
Creating A Simple Authentication Run As Account
Steps
1. Log on to OpsMgr 2012 as an administrator for the OpsMgr Management Group.
2. On the OpsMgr console, click Administration.
3. Right-click Accounts, and then click Create Run As Account.
The Create Run As Account Wizard screen is displayed.
4. Click Next.
5. From the Run As Account type drop-down menu, select Simple Authentication.
6. Provide a display name in the Display Name text box.
7. Provide a brief description in the Description text box and click Next.
8. On the Credentials screen provide the iDRAC login credentials for the systems you want to discover using the Agent-free
monitoring feature.
9. Click Next.
10. Select the Less secure or More secure option as appropriate.
For more information, see the OpsMgr documentation at technet.microsoft.com/en-us/library/hh321655.aspx.
NOTE:
If the iDRAC login credentials are different for each of the systems, create a separate Run As Account for each
of them.
11. Click Create.
12. After the Run As Account has been created, click Close.
Associating Run As Account for Monitoring a Dell
Server Using the Agent-free Monitoring Feature
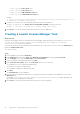
About this task
For monitoring the Dell server, the Run As account used to discover it must be associated with the Dell server in the SMASH
Device Monitoring Profile. The management pack performs the association automatically. But in some cases, you have to
manually associate the Run As account.
To manually associate the Run As account in the SMASH Device Monitoring Profile:
Steps
1. Launch OpsMgr 2012, and click Administration.
2. In the Administration pane, browse to Run As Configuration > Profiles.
3. From the list of available profiles, right-click SMASH Device Monitoring Profile and click Properties.
The Introduction screen is displayed.
4. Click Next.
12
Appendix B 67