
Users Guide

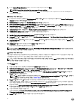
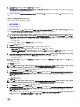
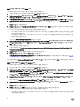
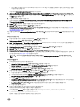
Table Of Contents
- Microsoft System Center Configuration Manager용 Dell Server Deployment Pack 버전 3.1 사용 설명서
- 소개
- Configuration Manager를 사용하기 전에
- Configuration Manager Version 1606, 2012 SP2, 2012 R2 SP1, 2012 R2, 2012 SP1, 또는 2012를 실행하는 시스템에서 Dell Server Deployment Pack 사용
- Troubleshooting
- 명령줄 옵션
- 기타 필요한 Dell 문서

Task Sequence Editor(작업 시퀀스 편집기) 창이 표시됩니다.
4. Add(추가) → Dell Deployment → Apply Drivers from Dell Lifecycle Controller(Dell Lifecycle Controller에서 드라이버 적
용
)를 클릭합니다.
Dell 서버 배포를 위한 사용자 지정 작업이 로드됩니다. 이때 작업 시퀀스를 변경할 수 있습니다.
노트: 처음으로 작업 시퀀스를 편집하면 Setup Windows and Configuration Manager(Windows 및 Configuration
Manager 설정) 오류 메시지가 표시됩니다. Configurations Manager 클라이언트 업그레이드 패키지를 생성하고 선택
하여
오류를 해결하십시오. 패키지 생성에 대한 자세한 내용은 technet.microsoft.com에서 Configuration Manager
설명서를 참조하십시오.
작업 시퀀스에 Diskpart Clean 추가
1. Task Sequence Editor(작업 시퀀스 편집기)에서 Add(추가) → General → Command Line(일반 명령줄)을 클릭합니다.
2. Name(이름) 텍스트 상자에 명령줄 이름으로
Diskpart Clean
을 입력합니다.
3. 입력 명령줄 옵션 diskpartclean.bat를 선택합니다.
4. Dell PowerEdge Deployment → Dell PowerEdge Custom Reboot Script 패키지를 선택합니다.
작업 시퀀스 작업 구성
Task Sequence Editor(작업 시퀀스 편집기)에서 PowerEdge Server Configuration(PowerEdge Server 구성)을 선택하면 다음
탭이 표시됩니다.
• Action Settings(작업 설정)
• 변수 대체
• Logs/Return Files(로그/반환 파일)
이 섹션에서는 Action Settings(작업 설정) 탭에 대해 설명합니다. Variable Replacement(변수 대체) 탭에 대한 자세한 내용은
변수 대체를 참조하십시오. Logs/Return Files(로그/반환 파일) 탭에 대한 자세한 내용은 로그/반환 파일을 참조하십시오.
정적 IP 네트워크에서 작업 시퀀스 배포
다음과 같은 단계에 따라 작업 시퀀스를 배포합니다.
• .CSV 파일 준비
• 대상 가져오기
• OS 배포용 부팅 매체 생성
• OS 배포용 부팅 매체 사용
.CSV 파일 준비
각 대상의 행을 추가하여 C:\Program Files\Microsoft Configuration Manager\OSD\Lib\Packages\Deployment\Dell
\PowerEdge\NetworkSetting\Samples\MACIPMap.csv에 있는 샘플 CSV 파일을 업데이트합니다.
노트: 각 대상의 해당 MAC 주소가 네트워크에 연결되어 활성 상태인 대상 NIC 포트의 MAC 주소와 일치해야 합니다.
노트: EnableDHCP가 참일 경우 IPAddress, SubnetMask 및 IPGateway의 값이 무시되지만, WinPE 및 이전 OSD 네
트워크 설정값을 위한 DNS 서버 설정에 DNS 필드가 사용됩니다.
Importing targets
1. In the left side of Configuration Manager, expand Assets and Compliance, right-click Devices, and select Import Computer
Information wizard.
2. Select Import computers using a file and click Next.
3. Enter the file path in the Import file text box or click Browse to navigate to the location where the file you want import is
stored.
4. Select the This file has column headings check box.
5. From the Assign As drop-down list select Variable and click Next.
15