
Users Guide
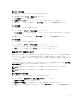

Configuring System BIOS
To configure your system BIOS:
1. Right-click the task sequence and click Edit.
2. From the left hand side of the Task Sequence Editor, under Configure Hardware → Step 1 , click Set
BIOS Config (ini file) → Action Settings tab.
3. Select BIOS Config (ini file) from the Configuration action type: drop-down menu.
The View button is enabled.
NOTE: You can also select BIOS Config (command line) if you want configure system using the
CLI option. For more information on the CLI option usage, see Command Line Options.
4. Click View to open the ini file. Make modifications as per the configurations required and save the
file.
For information on the ini file format, see “Sample File Formats” in the Dell OpenManage Deployment
Toolkit Version 4.4 Command Line Interface Reference Guide available at dell.com/support/
manuals.
5. Select Save to a file in the toolkit package for this custom action when I click OK, in the pop-up
message, click OK, and then click OK.
6. Save the file in the default directory.
An example of default directory: \\<site server hostname>\sms_<site code>\OSD\lib\Packages
\Deployment\Dell\PowerEdge\DTK\Template\Configs\Syscfg.
7. Click Apply to save the edited file to the task sequence.
8. Select Set from the Action: drop-down menu.
The Configuration file/Command line parameters field is enabled. For more information see,
Configuration file/Command line Parameter Options.
Alternatively, you can select the <Create configuration file> option from the drop-down to create an ini
file from the start.
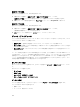
設定ファイル / コマンドラインパラメータのオプション
次の 3 つのオプションから選択できます。
• <設定ファイルの作成>
• <設定ファイルのインポート>
• <syscfg.ini> の編集
注意: パッケージ内の新しいファイルをアップデートまたは保存しても、そのファイルはすべての配布
ポイントにおいて自動的にアップデートされません。その新しいファイルを必要とするシステムでの
ファイルの可用性を確実にするには、ソフトウェア配布 → パッケージ → Dell PowerEdge 展開 → Dell
PowerEdge Deployment ToolKit Integration <バージョン> ノードから、配布ポイントをアップデート
する必要があります。
<
設定ファイルの作成
>
<設定ファイルの作成> オプションを選択すると、作成 ボタンが表示されます。
1. 作成 をクリックします
2. 設定ファイルエディタ で、次のいずれか 1 つのオプションを選択します。
13