
Users Guide


N.B.: When editing a task sequence for the first time, an error message Setup Windows and
ConfigMgr is displayed, create and select the Configurations Manager Client Upgrade package
to resolve the error. For more information on creating packages, see the Configuration
Manager 2012 documentation at technet.microsoft.com.
You can now make changes to the task sequence accordingly. For more information on configuring task
sequence actions like system BIOS, RAID, DRAC, and iDRAC, see Configuring Task Sequence Actions.
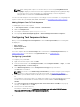
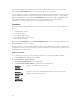
Adding Diskpart Clean To Task Sequence
To add diskpart clean to Task Sequence:
1. In Task Sequence Editor, click Add → General → Command Line.
2. Name it as Diskpart Clean.
3. Select input command line option diskpartclean.bat.
4. Select package Dell PowerEdge Deployment → Dell PowerEdge Custom Reboot Script 2.1.
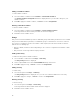
Configuring Task Sequence Actions
When you select PowerEdge Server Configuration from the Task Sequence Editor, the following tabs
are displayed:
• Action Settings
• Variable Replacement
• Logs/Return Files
This section explains about the Action Settings tab. For information on Variable Replacement tab, see
Variable Replacement. For information on Logs/Return Files tab, see Log/Return Files .
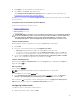
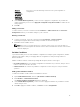
Configuring System BIOS
To configure your system BIOS:
1. Right-click the task sequence and click Edit.
2. From the left hand side of the Task Sequence Editor, under Configure Hardware → Step 1 , click Set
BIOS Config (ini file) → Action Settings tab.
3. Select BIOS Config (ini file) from the Configuration action type: drop-down menu.
The View button is enabled.
NOTE: You can also select BIOS Config (command line) if you want configure system using the
CLI option. For more information on the CLI option usage, see Command Line Options.
4. Click View to open the ini file. Make modifications as per the configurations required and save the
file.
For information on the ini file format, see “Sample File Formats” in the Dell OpenManage Deployment
Toolkit Version 4.4 Command Line Interface Reference Guide available at dell.com/support/
manuals.
5. Select Save to a file in the toolkit package for this custom action when I click OK, in the pop-up
message, click OK, and then click OK.
6. Save the file in the default directory.
An example of default directory: \\<site server hostname>\sms_<site code>\OSD\lib\Packages
\Deployment\Dell\PowerEdge\DTK\Template\Configs\Syscfg.
12