
Users Guide


7. Click Create.
The boot image creation process begins. A progress bar shows the status of the boot image creation.
Once the boot image is created, the boot image details are displayed on the Summary screen, the
information includes DTK details, and success state.
8. Right-click each of the newly created boot images and perform the update and manage distribution
points operations.
NOTE: You can view the DTK configuration details only by using the PowerEdge Deployment
ToolKit Configuration Wizard.
Enabling Command Prompt for Debugging Boot Images
NOTE: To display the debug console during deployment, press <F8>.
To enable command prompt to debug boot images:
1. Launch Configuration Manager Console.
2. From the left pane of the Configuration Manager Console, select Software Library → Overview →
Operating Systems → Boot Images.
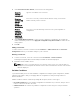
3. Right-click on the boot image and select Properties.
4. In the Properties window, select the Customization tab and select Enable Command Prompt
(testing only) check box.
5. Click Apply, and proceed with distribute content and updating distribution points. For more
information, see Distributing Content and Updating Distribution Points.
Importing Dell Server Driver Packages
Dell Server Deployment Pack provides a wizard to create driver packages in Configuration Manager based
on the server-operating system combination, out of the drivers available in the Dell Systems Management
Tools and Documentation DVD. These packages are used in the task sequences that are used for
operating system deployment.
1. Insert the Dell Systems Management Tools and Documentation DVD version 6.2 (or later) in your
system drive. You can download the latest ISO image of the DVD from support.dell.com.
2. Launch Configuration Manager Console.
3. From the left pane of the Configuration Manager Console, select Software Library → Overview →
Operating Systems → Driver Packages.
4. Right-click Driver Packages, select Dell Server Driver Package → Import Dell PowerEdge Server
Driver Packages. The Dell PowerEdge Server Driver Package Import Wizard displays asking for the
location of the Systems Management DVD.
NOTE: If you have downloaded an ISO image, then create a physical disk or mount it on a
virtual drive.
5. Select the drive in which you inserted the DVD and click Next.
A list of the driver packages for a combination of the servers and operating systems is displayed.
6. Select the required packages and click Finish.
A progress bar displays the status of the import. After the import is complete, the import summary is
displayed.
NOTE: Sections involving importing of drivers may take more time without updating the
progress bar.
11