
Users Guide

○ New files not in Dell FTP Catalog
○ All files not in Dell FTP Catalog
6. Click the Actions tab, and select one of the following options:
● Import updates to a repository in Dell Repository Manager Database — This option allows you to import updates
to a new repository in the Dell Repository Manager. This option is selected by default. You can type a prefix for the new
repository. By default the prefix is Repo.
● Save updates to a local repository — This option is also selected by default. If you want to save the update file locally,
then click Browse to navigate to that location where you want to save the update file.
● Export updates as a Lightweight Deployment Package (LWDP) — Select this option and click Browse to navigate
to the location where you want to save the update file as an LWDP. You can save all the updates to a folder or do a force
update. You can select any of the following:
○ Force script to update regardless of version and date.
○ Combine scripts for platforms into one folder. This will minimize disk space.
7. Click the Schedule tab.
8. Select the Start date, Settings, and Security Options.
● Start: — You can set the date and time for the automatic search.
● Settings — You can set the frequency of the schedule.
● Security Options — You can set the type of security.
NOTE: The Save button becomes active after all of the options have been selected.
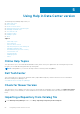
9. Click Email tab
The Email Configuration window displays the details of Default Email Address: Email Type: and the relevant Server:
information. Refer Configuring Email Settings to know more about, how you can configure and test emails using DRM.
10. You can use the Notify Additional Email Accounts option to Add>> or Remove<< more recipients. The sender’s email
address automatically adds to the recipient’s list while sending the notification mail.
11. Click Finish to complete the process.
A Task Creation pop-up window is displayed.
12. Click Yes or click No to exit the window.
An Automatic Search widow is displayed confirming that the task has been successfully created.
13. Click OK.
Notification by email
The email feature helps you to get an email notification when a new update is available for download.
1. In the Dell Repository Manager window, click Source > Schedule Automatic Search.
The Automatic Search window is displayed. You can select Cancel at any time to exit without making any changes.
2. Under Email, select any one of the following:
● SMTP
● Microsoft Exchange
NOTE:
If you select the SMTP , you have to provide the Sender Details and SMTP Options. You can use the Use
Anonymous authentication option while authenticating a SMTP service over network.
NOTE: If the login credential is different from the default credentials, you have to provide the Email ID, Password,
User Name and Domain details.
NOTE: For email clients like Gmail, Yahoo and Rediffmail the SMTP configurations are available online. You should
provide the SMTP Server, Port Number and Proxy Server details to configure the SMTP Options for the
corresponding mailing clients. If you do not have the Proxy Server details, contact your system administrator.
3. Select the Bypass Proxy check box, to bypass the proxy settings for the local address.
4. Select the Use SSL check box, to use Secure Socket Layer (SSL) if the email client requires SSL service.
5. After the configuring, click Send Test Email to verify the mail setup.
56
Using the Dell Repository Manager