
Users Guide

8. Click Next.
The Email Configuration window displays the details such as default email address, email type, and the server details. For
more details regarding configuring and testing emails in DRM, see Configuring Email Settings.
You can use the Notify Additional Email Accounts option to add or remove more recipients. The sender’s email address
automatically gets added to the recipient’s list while sending the notification mail.
9. Click Finish to complete the process.
A Task Creation pop-up window is displayed.
10. Click Yes or click No to exit the window.
An Automatic Search widow is displayed confirming that the task is successfully created.
Comparing and updating repositories
You can compare the repositories you created or imported with the Source Repository, as well as with other available
repositories to view the differences and update the destination repository.
NOTE: DRM 2.2 onwards, DRM supports comparison feature at the bundle and the repository level. For more information
about comparing bundle, see Comparing Bundles.
To compare and update repositories:
1. In the Dell Repository Manager window, click My Repositories tab, select the repository, and click Open.
2. Click Run a comparison.
The Update Repository window is displayed. The instructions on updating the repository appear on the Summary screen.
3. From the Source Repository drop-down list, select a repository or the Source with which you want to compare the
repository you selected initially.
4. Click Compare.
The comparison details appear in the categorized tabs in the Update Repository window.
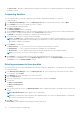
Table 2. Update repository tabs
Tab Description
Summary View the comparison summary of the selected repositories. The summary displays the
number of new version files, changed files, and obsolete files. This also displays the total
number of files that are different among these repositories.
The Summary tab is displayed by default.
Newer Versions Click to view the latest versions of the updates available in the source repository. Select
the check box corresponding to the platform from which you want to add files to the
destination repository. The source and destination files appear on the right-hand side.
Select the check box corresponding to the files you want to add and click Update. You
have the option to select updates for a particular platform. Also, you can Select All
(System Filter) to apply all the changes.
Changed Files Click to view any component files whose hash values are different in the destination and
source repositories. Select the check box corresponding to the files (it shows the
platform details) you want to update in the destination repository and click Update. You
have the option to select updates for a particular platform. Also, you can Select All
(System Filter) to apply all the changes.
Old Files Click to view the files that exist in the destination repository but, not in the source
repository. Select the check box corresponding to the platform from which you want to
remove the files. The file names appear on the right-hand side. Select the check box
corresponding to the files you want to remove and click Update. You have the option to
select updates for a particular platform. Also, you can Select All (System Filter) to
apply all the changes.
5. Select the updates for the destination repository.
6. Select the Show report after update check box if you want to view the update report.
The destination repository is updated with the latest versions of the updates available in the source repository.
Using the Dell Repository Manager
31