
Users Guide

7. Set the start date, settings and security options in the following fields:
● Start — You can set the date and time for the automatic search.
● Settings — You can set the frequency of the schedule.
● Security Options — You can set the type of security.
8. Click Next.
The Email Configuration window displays the details such as default e-mail address, e-mail type, and the server details. For
more details regarding configuring and testing emails in DRM, see Configuring Email settings.
9. You can use the Notify Additional Email Accounts option to add or remove more recipients. The sender’s email address
automatically gets added to the recipient’s list while sending the notification mail.
10. Click Finish to complete the process.
A Task Creation pop-up window is displayed.
11. Click Yes or click No to exit the window.
An Automatic Search widow is displayed confirming that the task is successfully created.
12. Click OK.
NOTE: Once you download updates to the repository using the Schedule Repository option, one Archived Bundle is
created automatically. You can see the old files (components) are saved under the Archived Bundle. In case, you want
to use the older versions of any component, you can select the old component from the Archived Bundle.
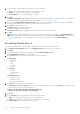
Scheduling Bundle Search
To schedule the bundle Search, you should have the bundles created or added within the repository.
1. In the Dell Repository Manager window, click My Repositories tab, select any of the repositories.
2. Click Open.
3. On the Bundles screen, select any of the bundles and click Schedule Bundle Search.
The Schedule Bundle Search window is displayed.
4. On the Search tab, select the type of update files from the following list:
● Update Type
○ Application
○ BIOS
○ Driver
○ Firmware
○ Utilities
● Criticality
○ Optional
○ Recommended
○ Urgent
● Operating System
○ Windows 32–bit
○ Windows 64–bit
○ Linux (32–bit & 64–bit)
5. Click Next and select any of the following options:
● Save updates to a local repository- If you want to save the update file locally, then click Browse to navigate to that
location where you want to save the update file.
● Replace old files with new files in all bundles(DUP only)
● Refresh for inventory of Dell Console Integration
6. Click Next.
7. On the Schedule tab, set the start date, settings and security options:
● Start- You can set the date and time for the automatic search.
● Settings- You can set the frequency of the search as per your convenience.
● Security Options- You can set the type of security.
30
Using the Dell Repository Manager