
Users Guide
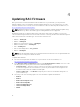
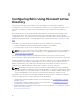

Table Of Contents
- Dell Remote Access Configuration Tool for Microsoft Windows Operating Systems Version 1.2 User's Guide
- Introducing Dell Remote Access Configuration Tool
- Installing and Uninstalling DRACT
- Discovering, Importing, and Verifying RACs
- Updating RAC Firmware
- Configuring RACs Using Microsoft Active Directory
- Troubleshooting and Frequently Asked Questions

Configuring RACs Using AD Standard Schema
In standard schema, a standard group object is used as a role group on the AD server. A user who has
access to RACs is a member of the role group. To provide access to a specific RAC for this user, the role
group name and its domain name must be configured on the specific RAC. You must specify an existing
role group name available on the AD server. The role and the privilege level are defined on each RAC. You
can define and configure up to five role groups. For more information on standard schema, see the
appropriate RAC user guide listed in
Other Documents You May Need.
To configure RACs using AD standard schema settings:
1. Discover and verify the RAC IP addresses on your network. For more information, see
Discovering,Importing,and Verifying RACs.
2. In the Firmware Update Configuration window, click Next.
The Active Directory Configuration window is displayed. The Schema column indicates that the
RAC is configured to a standard or extended schema. If it is not configured, the Schema column
displays Disabled.
3. Under Filter on Schema, select one of the following filter options to select the RACs that you must
configure:
• Standard Schema
• Extended Schema
• Active Directory disable
When you select a filter type, the corresponding RAC IP addresses are selected from the list. You
can also select individual RAC IP addresses from the list.
4. Under New Schema, select Standard Schema and click Next.
The Common Settings window is displayed. The settings in this window are common for both
standard and extended schema.
5. In the Common Settings window, enter the following:
• Under Upload Active Directory CA certificate, click Browse and select the CA certificate file to
be uploaded.
NOTE: This is optional for iDRAC6, iDRAC7, iDRAC8, and CMC (PowerEdge VRTX) but
mandatory for DRAC5 and CMC (PowerEdge M1000e). The AD CA certificate that is being
uploaded must be the same certificate that is on the AD server. For iDRAC6, iDRAC7,
iDRAC8, and CMC (PowerEdge VRTX), if the certificate is not specified, the default SSL
certificate is used.
• If you have selected the RAC IP addresses for iDRAC6, iDRAC7, iDRAC8, or CMC (PowerEdge
VRTX), click the iDRAC6/iDRAC7/iDRAC8/CMC (PowerEdge VRTX) tab and enter the AD settings.
For information about the settings, see the Dell Remote Access Configuration Tool Online Help.
• If you have selected the RAC IP addresses for DRAC5 or CMC (PowerEdge M1000e), click the
DRAC5 / CMC (PowerEdge M1000e) tab and enter the AD settings. For information about the
settings, see the Dell Remote Access Configuration Tool Online Help.
6. Click Next.
The Standard Schema Settings window is displayed.
7. Enter the standard schema settings for the RAC type. For information about the settings, see Dell
Remote Access Configuration Tool Online Help.
8. Click Apply.
The Summary window displays the following information for the selected RACs:
• RAC IP address
15