
Owner's Manual

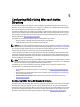

If the configuration is not complete, the Status column displays one of the following messages for the IP
address(es):
* Certificate Upload Failed - CA certificate uploaded is invalid.
* Configuration Failed - RAC configuration is not successful.
* Insufficient Privileges - The required privileges are not provided to configure the RAC.
For more information on the Status column messages, see Troubleshooting and Frequently Asked
Questions.
After all the configurations are completed, the message "Done" is displayed.
9. Click OK. The standard schema settings are configured for the selected RAC IP addresses.
Creating RAC objects and Configuring RACs Using AD Extended
Schema
Dell has extended the AD schema to include an association, device, and privilege property. The association property is
used to link together the users or groups with a specific set of privileges to one or more RAC devices.
For each physical RAC on the network that you need to integrate with the AD server for authentication and authorization,
it must have at least one association object and one RAC device object.
You need to specify the AD server login credentials to:
• Connect to the AD server and create the RAC device objects in the AD server.
• Connect to the AD server and set an association object and a privilege object for each RAC.
You can have multiple association objects, and each association object can be linked to as many users, groups of users,
or RAC device objects as required. The users and RAC device objects can be members of any domain in the enterprise.
However, each association object can be linked (or, may link users, groups of users, or RAC device objects) to only one
privilege object.
For extended schema configuration, depending on the RAC type, the respective extended schema objects must be
assigned. For example, the old extended schema objects are assigned to DRAC 4, DRAC 5, and CMC and the new
extended schema objects are assigned to iDRAC6 and iDRAC7. For more information on extended schema, see the
appropriate RAC user guide listed in Other Documents You May Need.
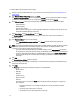
To create RAC objects and configure RACs using extended schema based AD settings:
1. Discover and verify the RAC IP addresses on your network. For more information, see Discovering Importing and
Verifying RACs.
2. In the Firmware Update Configuration window, click Next.
The Active Directory Configuration window is displayed.
3. Under Filter on Schema, select one of the following options to filter the RACs that you want to configure:
– Standard Schema
– Extended Schema
– Active Directory disable
When you select a filter type, the corresponding RAC IP addresses are selected from the list. You can also
select individual RAC IP addresses from the list.
4. Under New Schema, select Extended Schema and click Next.
The Common Settings window is displayed. The settings provided in this window are common for both standard
and extended schema.
5. Enter the following:
19