
Owner's Manual


Configuring Your Network 15
Configuring a DNS Server
To configure a DNS server using GNS:
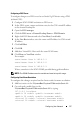
1
Configure GNS VIP address on DNS server—In the DNS, create a name
resolution entry for the GNS virtual IP address in the forward Lookup zones.
a
Open the
DNS manager
.
b
Click
DNS server
Forward Lookup Zones
DNS Domain
.
c
Right-click
DNS domain
and select
New Host (A or AAAA)
.
d
In the
New Host
windows, enter the name and IP address for GNS
virtual IP address.
e
Click
Add Host
.
f
Click
OK.
g
Click
Done
on
New Host
window.
For example:
gns-server Host A 192.0.2.2
Where,
gns-server
is the GNS virtual IP address given during grid
installation. The address that you provide must be routable and
should be in public range. For example, 192.0.2.2.
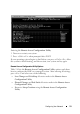
2
Configure the GNS sub-domain delegation—In the DNS server, establish
DNS Lookup that directs the DNS resolution of a GNS sub-domain to the
cluster. Open the DNS-Manager and do the following:
a
Click
DNS server
Conditional Forwarders
.
b
Right-click
Conditional Forwarders
and select
New Conditional
Forwarder.
c
In the
New Conditional Forwarders
window, enter the GNS sub-
domain and GNS VIP address (which you must provide during grid
installation).
Example:
clusterdomain.subdomain.com (GNS Sub-
domain) 192.0.2.2
(GNS VIP configured in the step 1)
d
Click
OK.
e
Restart the DNS service.