
Owner's Manual


14 Deployment Guide
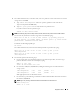
4
Ty p e :
service network restart
5
Ty p e
ifconfig
to verify that the IP addresses are set correctly.
6
To check your network configuration, ping each public IP address from a client on the local area
network (LAN) outside the cluster.
7
Connect to each node to verify that the public network is functioning and type
ssh <public IP>
to verify that secure shell (ssh) is working.
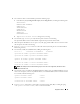
Configuring the Private Network Using Bonding
Before you deploy the cluster, configure the private cluster network to allow the nodes to communicate
with each other. This involves configuring network bonding and assigning a private IP address and
hostname to each node in the cluster. To set up network bonding for Broadcom or Intel network
interface cards (NICs) and configure the private network, perform the following steps on each node:
1
Log in as
root
.
2
Add the following line to the
/etc/modules.conf
file:
alias bond0 bonding
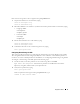
3
For high availability, edit the
/etc/modules.conf
file and set the option for link monitoring.
The default value for
miimon
is 0, which disables link monitoring. Change the value to
100 milliseconds initially, and adjust it as needed to improve performance, as shown in the following
example. Type:
options bonding miimon=100 mode=1
4
In the
/etc/sysconfig/network-scripts/
directory, create or edit the
ifcfg-bond0
configuration file.
For example, using sample network parameters, the file would appear as follows:
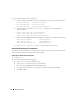
DEVICE=bond0
IPADDR=192.168.0.1
NETMASK=255.255.255.0
NETWORK=192.168.0.0
BROADCAST=192.168.0.255
ONBOOT=yes
BOOTPROTO=none
USERCTL=no
The entries for
NETMASK
,
NETWORK
, and
BROADCAST
are optional.
DEVICE=bondn
is the required name for the bond, where
n
specifies the bond number.
IPADDR
is the private IP address.
To use bond0 as a virtual device, you must specify which devices will be bonded as slaves.