
Owner's Manual


12 Deployment Guide
Depending on the number of NIC ports available, configure the public and private interfaces as shown in
Table 1-5.
Configuring and Teaming the Private Network
Before you deploy the cluster, assign a private IP address and host name to each cluster node. This procedure
ensures that the nodes can communicate with each other through the private interface.
Table 1-6 provides an example of a network configuration for a two-node cluster.
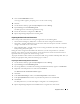
Configuring NIC Teaming For Your Private Network Adapters
1
On node 1, identify two network adapters that will be used for NIC teaming.
2
Connect an Ethernet cable from each selected network adapter to the private network switch.
3
On node 1, if you have Intel NICs, configure the NIC teaming by doing the following:
a
On the Windows desktop, click
Start
and select:
Programs
→
Intel Network Adapters
→
Intel(R) PROSet for Wired Connections
.
The
Intel(R) PROSet for Wired Connections
window appears.
b
Click
Action
, select
Add to Team,
and then select
Create New Team
.
c
In the
Teaming Wizard
window, select
Adaptive Load Balancing
and click
Next
.
d
In the
Select the adapters for this team
box, select the network adapters you identified for NIC
teaming and click
Next
.
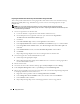
Table 1-5. NIC Port Assignments
NIC Port Three Ports Available Four Ports Available
1 Public IP and virtual IP Public IP
2 Private IP (NIC team) Private IP (NIC team)
3 Private IP (NIC team) Private IP (NIC team)
4 NA Virtual IP
Table 1-6. Network Configuration Example
Host Name Type IP Address Registered In
rac1 Public 172.16.170.1 %SystemRoot%\system32\drivers\etc\hosts
rac2 Public 172.16.170.2 %SystemRoot%\system32\drivers\etc\hosts
rac1-vip Virtual 172.16.170.201 %SystemRoot%\system32\drivers\etc\hosts
rac2-vip Virtual 172.16.170.202 %SystemRoot%\system32\drivers\etc\hosts
rac1-priv Private 10.10.10.1 %SystemRoot%\system32\drivers\etc\hosts
rac2-priv Private 10.10.10.2 %SystemRoot%\system32\drivers\etc\hosts