
Users Guide
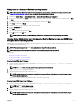
Table Of Contents
- Dell EMC OpenManage Server Administrator Version 9.0.1 User's Guide
- Introduction
- Installation
- Updating individual system components
- Storage Management Service
- Instrumentation Service
- Remote Access Controller
- Logs
- What is new in this release
- Systems management standards availability
- Server Administrator Home Page
- Other Documents You May Need
- Obtaining Technical Assistance
- Contacting Dell EMC
- Setup And Administration
- Role-Based Access Control
- Authentication
- Encryption
- Assigning User Privileges
- Adding users to a domain on Windows operating systems
- Creating Server Administrator users for supported Red Hat Enterprise Linux and SUSE Linux Enterprise Server operating systems
- Disabling Guest And Anonymous Accounts In Supported Windows Operating Systems
- Configuring The SNMP Agent
- Firewall Configuration On Systems Running Supported Red Hat Enterprise Linux Operating Systems And SUSE Linux Enterprise Server
- Using Server Administrator
- Logging In And Out
- Server Administrator Local System Login
- Server Administrator Managed System Login — Using the Desktop Icon
- Server Administrator Managed System Login — Using The Web Browser
- Central web server login
- Using The Active Directory Login
- Single Sign-On
- Configuring Security Settings On Systems Running A Supported Microsoft Windows Operating System
- The Server Administrator home page
- Using The Online Help
- Using The Preferences Home Page
- Using The Server Administrator Command Line Interface
- Logging In And Out
- Server Administrator services
- Working with remote access controller
- Viewing Basic Information
- Configuring The Remote Access Device To Use A LAN Connection
- Configuring The Remote Access Device To Use A Serial Port Connection
- Configuring The Remote Access Device To Use A Serial Over LAN Connection
- Additional Configuration For iDRAC
- Configuring Remote Access Device Users
- Setting Platform Event Filter Alerts
- Server Administrator logs
- Setting Alert Actions
- Troubleshooting
- Frequently Asked Questions

Conguring the SNMP agent on systems running supported VMware ESXi 6.X operating systems
Server Administrator supports SNMP traps on VMware ESXi 6.X. If a stand-alone license is only present, SNMP conguration fails
on VMware ESXi operating systems. Server Administrator does not support SNMP Get and Set operations on VMware ESXi 6.X as
the required SNMP support is unavailable. The VMware vSphere Command-Line Interface (CLI) is used to congure systems
running VMware ESXi 6.X to send SNMP traps to a management station.
NOTE: For more information about using the VMware vSphere CLI, see vmware.com/support.
Conguring Your System To Send Traps To A Management Station
Server Administrator generates SNMP traps in response to changes in the status of sensors and other monitored parameters. One
or more trap destinations must be congured on the system running Server Administrator for SNMP traps to be sent to a
management station.
To congure your ESXi system running Server Administrator to send traps to a management station:
1. Install the VMware vSphere CLI.
2. Open a command prompt on the system where the VMware vSphere CLI is installed.
3. Change to the directory where the VMware vSphere CLI is installed. The default location on Linux is /usr/bin. The default
location on Windows is
C:\Program Files\VMware\VMware vSphere CLI\bin.
4. Run the following command: vicfg-snmp.pl --server <server> --username <username> --password
<password> -c <community> -t <hostname> @162/<community>
where <server> is the hostname or IP address of the ESXi system, <username> is a user on the ESXi system,
<community> is the SNMP community name and <hostname> is the hostname or IP address of the management station.
NOTE: The extension .pl is not required on Linux.
NOTE: If you do not specify a user name and password, you are prompted.
The SNMP trap conguration takes eect immediately without restarting any services.
Firewall Conguration On Systems Running Supported Red Hat Enterprise Linux Operating
Systems And SUSE Linux Enterprise Server
If you enable rewall security while installing Red Hat Enterprise Linux/SUSE Linux, the SNMP port on all external network interfaces
is closed by default. To enable SNMP management applications such as IT Assistant to discover and retrieve information from Server
Administrator, the SNMP port on at least one external network interface must be open. If Server Administrator detects that the
SNMP port is not open in the rewall for any external network interface, Server Administrator displays a warning message and logs a
message to the system log.
You can open the SNMP port by disabling the rewall, opening an entire external network interface in the rewall, or opening the
SNMP port for at least one external network interface in the rewall. You can perform this action before or after Server
Administrator is started.
To open the SNMP port on Red Hat Enterprise Linux using one of the previously described methods:
1. At the Red Hat Enterprise Linux command prompt, type setup and press <Enter> to start the Text Mode Setup Utility.
NOTE: This command is available only if you have performed a default installation of the operating system.
The Choose a Tool menu appears.
2. Select Firewall Conguration using the down arrow and press <Enter>.
The Firewall Conguration screen appears.
3. Press <Tab> to select Security Level and then press the spacebar to select the security level you want to set. The selected
Security Level is indicated by an asterisk.
NOTE: For more information about the rewall security levels, press <F1>. The default SNMP port number is 161. If
you are using the X Window System graphical user interface, pressing <F1> may not provide information about
rewall security levels on newer versions of Red Hat Enterprise Linux.
a. To disable the rewall, select No rewall or Disabled and go to Step7.
19