
Users Guide
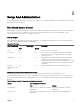
Table Of Contents
- Dell EMC OpenManage Server Administrator Version 9.0.1 User's Guide
- Introduction
- Installation
- Updating individual system components
- Storage Management Service
- Instrumentation Service
- Remote Access Controller
- Logs
- What is new in this release
- Systems management standards availability
- Server Administrator Home Page
- Other Documents You May Need
- Obtaining Technical Assistance
- Contacting Dell EMC
- Setup And Administration
- Role-Based Access Control
- Authentication
- Encryption
- Assigning User Privileges
- Adding users to a domain on Windows operating systems
- Creating Server Administrator users for supported Red Hat Enterprise Linux and SUSE Linux Enterprise Server operating systems
- Disabling Guest And Anonymous Accounts In Supported Windows Operating Systems
- Configuring The SNMP Agent
- Firewall Configuration On Systems Running Supported Red Hat Enterprise Linux Operating Systems And SUSE Linux Enterprise Server
- Using Server Administrator
- Logging In And Out
- Server Administrator Local System Login
- Server Administrator Managed System Login — Using the Desktop Icon
- Server Administrator Managed System Login — Using The Web Browser
- Central web server login
- Using The Active Directory Login
- Single Sign-On
- Configuring Security Settings On Systems Running A Supported Microsoft Windows Operating System
- The Server Administrator home page
- Using The Online Help
- Using The Preferences Home Page
- Using The Server Administrator Command Line Interface
- Logging In And Out
- Server Administrator services
- Working with remote access controller
- Viewing Basic Information
- Configuring The Remote Access Device To Use A LAN Connection
- Configuring The Remote Access Device To Use A Serial Port Connection
- Configuring The Remote Access Device To Use A Serial Over LAN Connection
- Additional Configuration For iDRAC
- Configuring Remote Access Device Users
- Setting Platform Event Filter Alerts
- Server Administrator logs
- Setting Alert Actions
- Troubleshooting
- Frequently Asked Questions

Conguring the SNMP agent on systems running supported SUSE Linux enterprise server
Server Administrator uses the SNMP services provided by the net-snmp agent. You can congure the SNMP agent to enable SNMP
access from remote hosts, change the community name, enable Set operations, and send traps to a management station. To
congure your SNMP agent for proper interaction with management applications such as IT Assistant, perform the procedures
described in the following sections.
NOTE: For additional details on SNMP conguration, see the operating system documentation.
Sever Administrator SNMP Install Actions
Server Administrator SNMP communicates with the SNMP agent using the SMUX protocol. When Server Administrator SNMP
connects to the SNMP agent, it sends an object identier to the SNMP agent to identify itself as a SMUX peer. This object identier
must be congured with the SNMP agent, therefore, Server Administrator adds the following line to the SNMP agent conguration
le, /etc/snmp/snmpd.conf, during installation if it does not exist:
smuxpeer .1.3.6.1.4.1.674.10892.1
Enabling SNMP Access From Remote Hosts
The default SNMP agent conguration on SUSE Linux Enterprise Server operating systems gives read-only access to the entire MIB
tree for the public community from the local host only. This conguration does not allow SNMP management applications such as IT
Assistant running on other hosts to discover and manage Server Administrator systems properly. If Server Administrator detects this
conguration during installation, it logs a message to the operating system log le,
/var/log/messages, to indicate that SNMP access
is restricted to the local host. You must congure the SNMP agent to enable SNMP access from remote hosts if you plan to manage
the system by using SNMP management applications from remote hosts.
NOTE: For security reasons, it is advisable to restrict SNMP access to specic remote hosts if possible.
To enable SNMP access from a specic remote host to a system running Server Administrator, edit the SNMP agent conguration
le, /etc/snmp/snmpd.conf, and perform the following steps:
1. Find the line that reads: rocommunity public 127.0.0.1.
2. Edit or copy this line, replacing 127.0.0.1 with the remote host IP address. When edited, the new line should read: rocommunity
public IP_address.
NOTE: You can enable SNMP access from multiple specic remote hosts by adding a rocommunity directive for
each remote host.
3. To enable SNMP conguration changes, restart the SNMP agent by typing: /etc/init.d/snmpd restart.
To enable SNMP access from all remote hosts to a system running Server Administrator, edit the SNMP agent conguration
le, /etc/snmp/snmpd.conf, and perform the following steps:
4. Find the line that reads: rocommunity public 127.0.0.1.
5. Edit this line by deleting 127.0.0.1. When edited, the new line should read: rocommunity public.
6. To enable SNMP conguration changes, restart the SNMP agent by typing: /etc/init.d/snmpd restart.
Changing The SNMP Community Name
Conguring the SNMP community name determines which management stations are able to manage your system through SNMP.
The SNMP community name used by management applications must match the SNMP community name congured on the system
running Server Administrator,, so the management applications can retrieve the management information from Server Administrator.
To change the default SNMP community name used for retrieving management information from a system running Server
Administrator:
1. Open the SNMP agent conguration le, /etc/snmp/snmpd.conf.
2. Find the line that reads: rocommunity public 127.0.0.1.
3. Edit this line by replacing public with the new SNMP community name. When edited, the new line should read:
rocommunity community_name 127.0.0.1.
4. To enable SNMP conguration changes, restart the SNMP agent by typing: /etc/init.d/snmpd restart.
18