
Users Guide

The algorithm determines the candidate mirror in the following order:
* Across connectors at the same level of enclosure and same size.
* Across connectors in the enclosure that are not at the same level but of same size.
* Across enclosures connected to the same connector and to a disk of the same size.
* Within the enclosure with a physical disk of acceptable size dierence.
* Across connectors at the same level of enclosure and of acceptable size dierence.
* Across connectors in the enclosure that are not at the same level of the enclosure but with a physical disk of
acceptable size dierence.
If the size dierence is not acceptable, the disk is not mirrored and hence dropped from the span. The number of spans and
disks in the span is recalculated.
NOTE: It is recommended that you use Intelligent Mirroring to create RAID 10 across enclosures for simple and
optimum conguration.
NOTE: To view the redundancy across enclosures achieved through Intelligent Mirroring, click the virtual disk and
view the physical disk IDs in each span, which are from alternate enclosures.
• Select RAID 50 to implement striping across more than one span of physical disks. RAID 50 groups n*s disks as one large
virtual disk with a capacity of s*(n-1) disks, where s is the number of spans and n is the number of disks within each span.
• Select RAID 60 to implement striping across more than one RAID 6 span. RAID 60 groups n*s disks as one large virtual disk
with a capacity of s*(n-2) disks, where s is the number of spans and n is the number of disks within each span. RAID 60
provides increased data protection and better read performance, but slower write performance.'
8. Select the Bus Protocol.
The possible options are:
• SAS
• SATA
9. Select the Media Type.
The available options are:
• HDD
• SSD
For more information on Bus Protocol and Media Type, see Virtual Disk Properties And Tasks.
10. Click Continue.
The Create Virtual Disk Advanced Wizard (Step 2 of 3) — <Controller Name> page is displayed with the connectors and
physical disks available.
Related links
Create Virtual Disk Express Wizard
Create Virtual Disk Advanced Wizard (Step 2)
Depending on the RAID level you selected in the Create Virtual Disk Wizard (Step 1) <Controller Name> page, the Create Virtual
Disk Advanced Wizard (Step 2 of 3) - <Controller Name> page displays the disks and connectors (channels or ports) available for
conguring the virtual disk.
NOTE: If you are creating an encrypted virtual disk, only the encrypted physical disks are displayed. Else, both encrypted
and unencrypted physical disks are displayed.
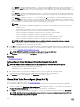
The following is an example of what might be displayed:
Connector 0
The Connector section of the page displays the connectors on the controller and the disks attached to each connector. Select the
disks you want to include in the virtual disk. In this example, the controller has a single connector with ve disks.
• Physical disk 0:0
135