
Install Guide


• Server Administrator Storage Management
• Remote Access Controller
Related Links:
Troubleshooting
Using The VMware vSphere Management
Assistant (vMA)
The vMA allows administrators and developers to run scripts and agents to manage ESX/ESXi systems. For more information on vMA,
see vmware.com/support/developer/vima/.
1. Log on to vMA as an administrator and provide the password when prompted.
2. Copy and unzip the OM-SrvAdmin-Dell-Web-<version>-<bldno>.VIB-ESX<version>i_<bld-revno>.zip file to a
directory on the vMA.
3. Shut down all guest operating systems on the ESXi host and put the ESXi host in maintenance mode.
4. In vMA, execute the following command:
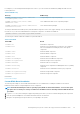
For VMware ESXi4.0/ESXi 4.1: vihostupdate --server <IP address of ESXi Host> -i -b <path to Dell
OpenManage file>
For VMware ESXi 5.0 U1: esxcli --server <IP Address of ESXi 5.0 host> software vib install -
d /var/log/vmware/<Dell OpenManage file>
5. Enter the root username and password of the ESXi host when prompted.
The command output displays a successful or a failed update.
6. Restart the ESXi host system.
When you run the command, the following components are installed on the system:
• Server Administrator Instrumentation Service
• Remote Enablement
• Server Administrator Storage Management
• Remote Access Controller
Install the Server Administrator Web Server separately on a management station.
After installing Server Administrator, enable the Server Administrator Services.
Related Links:
• Troubleshooting
• Enabling Server Administrator Services on the Managed System
Using The VMware Update Manager (VUM)
To install Server Administrator using VUM:
1. Install VMware vSphere 5.x (vCenter Server, vSphere Client, and VMware vSphere Update Manager) on a system running the
Windows Server 2008 R2 SP1 (64-bit) operating system.
2. On the desktop, double-click VMware vSphere Client and login to vCenter Server.
3. Right-click vSphere Client host and click New Datacenter.
4. Right-click New Datacenter and click Add Host. Provide information for the ESXi server per online instructions.
5. Right-click the ESXi host added in the previous step and click Maintenance Mode.
6. From Plug-ins select Manage Plug-ins > download VMware Update Manager (The status is enabled if the download is
successful.) Follow the instructions to install the VUM client.
7. Select the ESXi host. Click Update Manager > Admin view > Patch Repository > Import Patches and follow the online
instructions to upload the patch successfully.
The offline bundle is displayed.
8. Click Baselines and Groups.
9. Click create from Baselines tab, mention baseline name and select Host Extension as baseline type. Complete the rest as per
instructions.
Installing Systems Management Software On VMware ESXi
29