
Users Guide

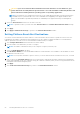
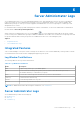
Table Of Contents
- Introduction
- Setup And Administration
- Role-Based Access Control
- Authentication
- Encryption
- Assigning User Privileges
- Adding Users To A Domain On Windows Operating Systems
- Creating Server Administrator Users For Supported Red Hat Enterprise Linux and SUSE Linux Enterprise Server Operating Systems
- Disabling Guest And Anonymous Accounts In Supported Windows Operating Systems
- Configuring The SNMP Agent
- Configuring The SNMP Agent On Systems Running Supported Windows Operating Systems
- Enabling SNMP Access On Remote Hosts (Windows Server 2003 Only)
- Changing The SNMP Community Name
- Configuring Your System To Send SNMP Traps To A Management Station
- Configuring The SNMP Agent On Systems Running Supported Red Hat Enterprise Linux
- SNMP Agent Access Control Configuration
- Server Administrator SNMP Agent Install Actions
- Changing The SNMP Community Name
- Configuring Your System To Send Traps To A Management Station
- Configuring The SNMP Agent On Systems Running Supported SUSE Linux Enterprise Server
- Sever Administrator SNMP Install Actions
- Enabling SNMP Access From Remote Hosts
- Changing The SNMP Community Name
- Configuring The SNMP Agent On Systems Running Supported VMware ESX 4.X Operating Systems To Proxy VMware MIBs
- Configuring The SNMP Agent On Systems Running Supported VMware ESXi 4.X And ESXi 5.X Operating Systems
- Configuring Your System To Send Traps To A Management Station
- Firewall Configuration On Systems Running Supported Red Hat Enterprise Linux Operating Systems And SUSE Linux Enterprise Server
- Using Server Administrator
- Logging In And Out
- Server Administrator Local System Login
- Server Administrator Managed System Login — Using the Desktop Icon
- Server Administrator Managed System Login — Using The Web Browser
- Central Web Server Login
- Using The Active Directory Login
- Single Sign-On
- Configuring Security Settings On Systems Running A Supported Microsoft Windows Operating System
- The Server Administrator Home Page
- Using The Online Help
- Using The Preferences Home Page
- Using The Server Administrator Command Line Interface
- Logging In And Out
- Server Administrator Services
- Working With Remote Access Controller
- Viewing Basic Information
- Configuring The Remote Access Device To Use A LAN Connection
- Configuring The Remote Access Device To Use A Serial Port Connection
- Configuring The Remote Access Device To Use A Serial Over LAN Connection
- Additional Configuration For iDRAC
- Configuring Remote Access Device Users
- Setting Platform Event Filter Alerts
- Server Administrator Logs
- Setting Alert Actions
- Setting Alert Actions For Systems Running Supported Red Hat Enterprise Linux And SUSE Linux Enterprise Server Operating Systems
- Setting Alert Actions In Microsoft Windows Server 2003 And Windows Server 2008
- Setting Alert Action Execute Application In Windows Server 2008
- BMC/iDRAC Platform Events Filter Alert Messages
- Troubleshooting
- Frequently Asked Questions

● Enable VLAN ID
● VLAN ID
● Priority
6. Configure the following IPv4 Properties:
● IP Address Source
● IP Address
● Subnet Mask
● Gateway Address
7. Configure the following IPv6 Properties:
● IP Address Source
● IP Address
● Prefix Length
● Default Gateway
● DNS Address Source
● Preferred DNS Server
● Alternate DNS Server
NOTE: You can configure the IPv4 and IPv6 address details only if you enable the IPv4 and IPv6 properties under
Additional Configuration.
8. Click Apply Changes.
Configuring The Remote Access Device To Use A
Serial Port Connection
To configure the BMC for communication over a serial port connection:
1. Click the Modular Enclosure > System/Server Module > Main System Chassis/Main System > Remote Access.
2. Click the Configuration tab.
3. Click Serial Port.
The Serial Port Configuration window appears.
4. Configure the following details:
● Connection Mode Setting
● Baud Rate
● Flow Control
● Channel Privilege Level Limit
5. Click Apply Changes.
6. Click Terminal Mode Settings.
In the Terminal Mode Settings window, you can configure terminal mode settings for the serial port.
Terminal mode is used for Intelligent Platform Interface Management (IPMI) messaging over the serial port using printable
ASCII characters. Terminal mode also supports a limited number of text commands to support legacy, text-based
environments. This environment is designed so that a simple terminal or terminal emulator can be used.
7. Specify the following customizations to increase compatibility with existing terminals:
● Line Editing
● Delete Control
● Echo Control
● Handshaking Control
● New Line Sequence
● Input New Line Sequence
8. Click Apply Changes.
9. Click Back To Serial Port Configuration Window to go to back to the Serial Port Configuration window.
Working With Remote Access Controller
51