
Installation manual

9. Right-click Personal, select All tasks → Request New Certificate .
10. Click Next.
11. Select the appropriate certificate type, Mostly (Computer), and click Enroll.
12. Click Finish.
Creating the HTTPS Listener With the Valid CA Signed Certificate
Run the installer and click the link on the prerequisite checker to create the HTTPS listener.
Using the SelfSSL Tool to Generate Self-Signed Certificates
To generate a self-signed certificate using the SelfSSL tool :
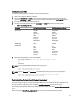
1. Create a certificate.
2. Add the certificate and take a thumbprint.
3. Create the WinRM HTTPS listener.
4. Configure the Envelope size for WinRM.
Creating a Certificate
1. Download the IIS Resource Kit from microsoft.com/downloads/details.aspx?FamilyID=56fc92ee-a71a-4c73-b628-
ade629c89499&displaylang.
2. Run iis60rkt.exe.
3. Click Next.
4. Select I Agree in the End-User License Agreement screen and click Next.
5. Click Next.
6. In the Select Type screen, select Custom and click Next.
7. Click Next.
8. In the Select Features screen, select SelfSSL 1.0 and click Next.
9. Click Next.
10. Click Finish.
The SelfSSL is installed.
11. Click Start → Programs → IIS Resource → SelfSSL → SelfSSL.
12. Type selfssl /T /N:CN=<computer_name or domain_name>.
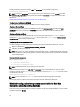
Adding a Certificate and Taking a Thumbprint
To add a certificate and take a thumbprint:
NOTE: If Internet Information Service (IIS) is already installed on the system, then the value of
CertificateThumbprint is an empty string and you need not perform the steps in this section. For example:
winrm create winrm/config/Listener?Address=*+Transport=HTTPS
@{Hostname="<host_name>";CertificateThumbprint=""}
1. Click Start → Run.
2. Type mmc and click OK.
3. Click File → Add/Remove Snap-in.
4. Click Add.
5. Click Certificates and click Add.
6. In the Certificates snap-in dialog box, select Computer account option and click Next.
7. Select Local Computer and click Finish.
22