
Users Guide
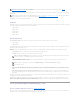

This screen displays the virtual disk attributes and enables you to assign a dedicated hot spare to the virtual disk.
Do the following:
1. Review the virtual disk attributes displayed in the Summary of Virtual Disk Attributes and the Selected Physical Disks sections of the screen. These
sections display the selections you made using "Create Virtual Disk Express Wizard (Step 1 of 2)" and the physical disks that the Express Wizard
selected.
If you need to change a selection, click Go Back To Previous Page to return to "Create Virtual Disk Express Wizard (Step 1 of 2)."
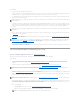
2. Review the Assign Dedicated Hot Spare section. A hot spare is an unused backup physical disk that can be used to rebuild data from a redundant virtual
disk. See "Protecting Your Virtual Disk with a Hot Spare" for more information.
Select the Physical Disk check box if you want to assign a dedicated hot spare.
The Physical Disk check box is not available if the controller does not have a physical disk that is a suitable hot spare for the virtual disk you are creating.
For example, the available physical disks may be too small to protect the virtual disk. If the Physical Disk check box is not available, you may need to
specify a smaller virtual disk, use a different RAID level, or change the disk selection using the Create Virtual Disk Advanced wizard.
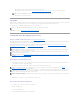
3. Do one of the following:
l Click Finish to create the virtual disk with the attributes shown on this screen.
For PERC H700 and PERC H800 controllers, if any of the drives you selected is in the spun down state, the following message is displayed: "The
below listed physical drive(s) are in the spun down state. Executing this task on these drive(s) will take additional time, because the drive(s) need
to spun up." The message displays the ID(s) of the spun down drive(s).
l Click Go Back To Previous Page to return to "Create Virtual Disk Express Wizard (Step 1 of 2)" if you want to change your selections.
l Click Exit Wizard to cancel the virtual disk.
Create Virtual Disk Advanced Wizard (Step 1 of 4)
Does my controller support this feature? See "Supported Features."
The Create Virtual Disk Advanced Wizard allows you to specify the read, write, and cache policy for the virtual disk. You can also select the physical disks and
the controller connector to be used. You need a good knowledge of RAID levels and hardware to use the Advanced Wizard.
Before creating a virtual disk, you should be familiar with the information in "Considerations Before Creating Virtual Disks." You may also want to review
"Choosing RAID Levels and Concatenation."
If you want to have the wizard choose a recommended virtual disk configuration for you, click Go To Express Wizard.
To Create a Virtual Disk Advanced Wizard: Step 1 of 4
1. Click the radio button to select the correct RAID level.
¡ Depending on the controller, Concatenated enables you to combine the storage capacity of several disks or to create a virtual disk using only a
single physical disk. See "Number of Physical Disks per Virtual Disk" for information on whether the controller supports a single physical disk or
two or more when using Concatenated. Using Concatenated does not provide data redundancy nor does it affect the read and write
performance.
¡ Select RAID 0 for striping. This selection groups n disks together as one large virtual disk with a total capacity of n disks. Data is stored to the
disks alternately so that they are evenly distributed. Data redundancy is not available in this mode. Read and write performance is enhanced.
¡ Select RAID 1 for mirroring disks. This selection groups two disks together as one virtual disk with a capacity of one single disk. The data is
replicated on both disks. When a disk fails, the virtual disk continues to function. This feature provides data redundancy and good read
performance, but slightly slower write performance. Your system must have at least two disks to use RAID 1.
¡ Select RAID 5 for striping with distributed parity. This selection groups n disks together as one large virtual disk with a total capacity of (n-1)
disks. When a disk fails, the virtual disk continues to function. This feature provides better data redundancy and read performance, but slower
write performance. Your system must have at least three disks to use RAID 5.
¡ Select RAID 6 for striping with additional distributed parity. This selection groups n disks as one large virtual disk with a capacity of (n-2) disks.
The virtual disk remains functional with up to two disk failures. RAID 6 provides better read performance, but slower write performance. Your
system must have at least four disks to use RAID 6.
¡ Select RAID 10 for striping over mirror sets. This selection groups n disks together as one large virtual disk with a total capacity of (n/2) disks.
Data is striped across the replicated mirrored pair disks. When a disk fails, the virtual disk continues to function. The data is read from the
surviving mirrored pair disk. This feature provides the best failure protection, read and write performance. Your system must have at least four
disks to use RAID 10. For PERC controllers with firmware version 6 and above, RAID 10 also allows to create a single span virtual disk with 22 or
NOTE: If a physical disk is receiving a SMART alert, it cannot be used in a virtual disk. For more information on SMART alerts, see "Monitoring Disk
Reliability on RAID Controllers."
NOTE: By default a secure virtual disk is created if the controller is security enabled and has sufficient number of secure physical disks to create a virtual
disk of the selected RAID level. In this case, the Summary of Virtual Disk Attributes displays a Secure Virtual Disk attribute with a value Yes, and only
secured physical disks are listed as candidates for hot spare.