
Users Guide


If the failed physical disk is part of a nonredundant virtual disk (such as RAID 0), then the failure of a single physical disk will cause the entire virtual disk to fail.
To proceed, you need to verify when your last backup was, and if there is any new data that has been written to the virtual disk since that time.
If you have backed up recently and there is no new data on the disks that would be missed, you can restore from backup.
Do the following:
1. Delete the virtual disk which is currently in a failed state.
2. Remove the failed physical disk.
3. Insert a new physical disk.
4. Create a new virtual disk.
5. Restore from backup.
Using the Physical Disk Online Command on Select Controllers
Does my controller support this feature? See "Supported Features"
If you do not have a suitable backup available, and if the failed disk is part of a virtual disk on a controller that supports the Online physical disk task, then you
can attempt to retrieve data by selecting Online from the failed disk's drop-down task menu.
The Online command attempts to force the failed disk back into a Online state. If you are able to force the disk into a Online state, you may be able to recover
individual files. How much data you can recover depends on the extent of disk damage. File recovery is only possible if a limited portion of the disk is damaged.
There is no guarantee you will be able to recover any data using this method. A forced Online does not fix a failed disk. You should not attempt to write new
data to the virtual disk.
After retrieving any viable data from the disk, replace the failed disk as described previously in "Replacing a Failed Disk that is Part of a Redundant Virtual Disk"
or "Replacing a Failed Physical Disk that is Part of a Nonredundant Virtual Disk."
Replacing a Failed Physical Disk in a RAID 1 on a CERC SATA1.5/2s
On a CERC SATA1.5/2s controller, a rebuild may not start automatically when you replace a failed physical disk that is part of a RAID 1 virtual disk. In this
circumstance, use the following procedure to replace the failed physical disk and rebuild the redundant data.
1. Shut down the system.
2. Disconnect the SATA cable on the failed physical disk in the RAID 1 virtual disk.
3. Replace the failed physical disk with a formatted physical disk. You can format the physical disk using the Disk Utilities in the controller BIOS. (You may
not need to format the entire physical disk. Formatting 1% of the disk may be sufficient.)
4. Reboot the system. When rebooted, the RAID 1 virtual disk should display a Failed Redundancy state.
5. Expand the controller object in the tree view and select the Physical Disks object.
6. Execute the Rebuild task for the physical disk you added.
Recovering from Removing the Wrong Physical Disk
If the physical disk that you mistakenly removed is part of a redundant virtual disk that also has a hot spare, then the virtual disk rebuilds automatically either
immediately or when a write request is made. After the rebuild has completed, the virtual disk will no longer have a hot spare since data has been rebuilt onto
the disk previously assigned as a hot spare. In this case, you should assign a new hot spare.
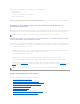
NOTE: If the failed disk is attached to a PERC 3/SC, 3/DC, 3/QC, 4/SC, 4/DC, 4e/DC, 4/Di, or CERC ATA100/4ch controller, you can attempt to recover
data from the disk by using the procedure described in "Using the Physical Disk Online Command on Select Controllers" before continuing with the
following procedure.