
Users Guide


100 Remote Access Service
Uploading a Certificate
To upload your server certificate or CA certificate to the DRAC firmware, the certificate must reside on
the DRAC’s host server. You must designate the CSR type, the exact filename, and the absolute file path
to the certificate on the server. Then, click Upload.
NOTE: Failure to enter the correct path for the location of the certificate on the host server does not result in a
warning message.
1
From the
Certificate Management
window, select the
Upload certificate
option and click
Next
.
The
Upload Certificate
window appears.
2
Select the certificate type from the drop-down menu.
The selections are
Server Certificate
and
CA Certificate
.
3
Type the exact path and filename of the certificate to be uploaded.
NOTE: When you have a fully qualified path or filename that contains spaces, you must place double
quotation marks around the string. For example, if your file is contained in c:\security
files\certificates\sslcert.cer, you must place the fully qualified path name and filename in double quotations
because a space appears between "security" and "files." For example:
c:\security
files\certificates\sslcert.cer
4
Click
Upload
.
A message appears stating that the certificate was successfully uploaded to the DRAC firmware.
5
Reset the DRAC to enable the new certificate.
NOTE: You must reset the DRAC after uploading the certificate to ensure that the new certificate is used.
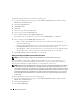
Viewing a Certificate
The following information is included on both the View Server Certificate and View CA Certificate
windows. See Table 8-1.
Table 8-1. Certificate Information
Attribute Value
Type Type of certificate, either a server certificate or a CA certificate
Serial Certificate serial number
Key Size Encryption key size
Valid From Issuance date of the certificate
Valid To Expiration date of the certificate
Subject Certificate attributes entered by the subject
Issuer Certificate attributes returned by the issuer