
Web Client Guide


228
File Management | File Server / File Management
4
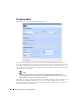
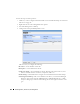
Configure the subsequent
Restore Device
screen.
This screen lets you configure the following:
Select Targets for Restore—This portion of the screen lets you Add Equipment, Add
Groups, or Remove All target devices. Listed targets and their Restore Config / Label
Selection. Click the icon in the Action column to remove the listed target.
Select what to apply to the selected target—This portion of the screen lets you select
either a label (like Current, Compliant and so on—a selector listing available labels
appears onscreen once you click this option), or Restore a specific Configuration File.
The latter lists available files and lets you click to select. Click Apply to configure the
selected target, or Apply to All to configure all targets.
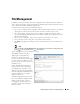
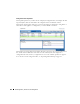
5
Click one of the buttons at the bottom of the screen to initiate the next backup action.
Add Schedule
opens the scheduling screen to let you automate the restoration you have
configured on a specified date, time, or repetition. See Scheduling Actions on page 365.
Execute
performs the restoration immediately. The
Results
tab in this screen opens,
displaying the message traffic between Dell OpenManage Network Manager and the
device(s). See Audit Trail Portlet on page 93.
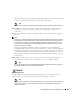
Save
preserves this configuration without scheduling or executing it.
Close
closes this screen without saving the configured restoration.