
Users Guide


Setting Up F5 BIGIP VNF Package | Configuring Virtualization
OMNM 6.5.3 User Guide 825
Now it is time to instantiate a VM from a vendor image.
Instantiating a VM from a Vendor Image
Instantiate a VM (virtual machine) in the new OpenStack project from the F5 vendor-provided
image as follows.
1
Boot up the F5 BIGIP LTM or F5 BIGIP ALL (AFM) image with the following network
connections.
2
Assign a floating IP Address to the eth0/mgmt connection.
3
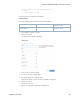
Log into the new VMs Web interface using the floating IP address.
For example:
https://10.122.0.244
4
Verify that the status changes to ONLINE (ACTIVE) and the proceeding status bar is green.
Now you are ready to make VM configurations changes.
Manually Making Configuration Changes
To enable automated resource management, the OpenManage Network Manager application
requires additional configuration to the VM post bootup and this configuration captured in the
new shapshot.
Manually make the required configuration changes to the running VM booted from the F5
vendor’s original image as follows.
NOTE:
Dorado Software provides an executable script in the F5 BIGIP Device Driver component that automates
the following configuration additions.
1
Go to a command line prompt.
On a Windows system, enter Cygwin Linux shell.
2
Run the following bash script to apply the management configuration.
$OWARE_USER_ROOT/oware/bin/oware.cmd
Linux interface name F5 Interface Name Network
eth0 mgmt net-mgmt
<None> * 1.1 net-data-1
<None> * 1.2 net-data-2
* The <None> interface names require CLI configuration along with a proper license before the
interface can be configured/enabled and pass traffic. This is done as post-bootup and post device
discovery configuration applied by the OpenManage Network Manager
(
OMNM
)
system (not part of the
base image snapshot).
Status
Information