
Users Guide


96 Configuring Protocols to Send Information to IT Assistant
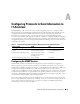
SNMP Community Names in IT Assistant and Server Administrator
For IT Assistant to successfully read information, modify information, and perform actions on a system
running Dell OpenManage Server Administrator (the Dell recommended server agent) and/or other
supported agents, the community names used by IT Assistant must match the corresponding
community read-only (Get) and read/write (Set) community names on the managed system. Also, for
IT Assistant to receive traps (asynchronous event notifications) from a system running Server
Administrator, the system must be configured to send traps to the system running IT Assistant.
Community Names Must Be Secure
There are operating system default names for both Get and Set community names. For security reasons,
these names should be changed. When selecting community names for your network, use the
following guidelines:
• Change both the Get and Set names to passwords that are hard to guess.
• Avoid using strings such as your company's name or phone number or any well known personal
information about yourself.
• Use an alphanumeric string that includes both letters and numbers, mixing uppercase and lowercase
letters; community names are case-sensitive.
• Use strings that are at least six characters long.
Configuring the SNMP Service on a System Running a Supported Windows Operating System
Running IT Assistant
IT Assistant may be installed on a system with any of following operating systems: Windows 2000,
Windows XP Professional, or Windows Server™ 2003. See the readme for the latest information on
supported operating systems details and hardware configuration.
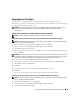
To install SNMP on the IT Assistant system, perform the following steps:
1
Click the
Start
button, point to
Settings
, and choose
Control
Panel
.
2
Double-click the
Add/Remove Programs
icon.
3
In the left-hand pane, click
Add/Remove Windows Components
.
4
Select
Management and Monitoring Tools
, click
Details
, select
Simple Network Management
Protocol
, and click
OK
.
5
Click
Next
.
The
Windows Optional Networking Components Wizard
installs SNMP.