
Users Guide


Configuring IT Assistant to Monitor Your Systems 55
Creating an Alert Action Filter
Now, Tom will create an Alert Action Filter that includes each of the four administrators who work for
him. In the following procedure, you can see how creating custom groups for the two types of servers
make it easier to create the filters.
To create an alert action filter:
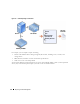
1
Select
Alerts
→
Filters
from the menu bar.
The
Alert Filters
window appears.
2
Expand the Alert Filters in the navigation tree and right-click
Alert Action Filters
. Select
New Action
Alert Filter
.
The
Add Filter Wizard
appears.
Tom plans to create three filters, one for each of the notification event actions that he is going to create
for each of his administrators. Tom has to create each of his three filters one at a time. Tom creates a
filter for the following:
• Datacenter first shift (M–F, 7 A.M.–7 P.M.)
• Datacenter second shift (M–F, 7 P.M.–7A.M.)
• Weekend administrator (Saturday and Sunday, 24 hours)
3
Enter a descriptive name for the filter.
Tom chooses
DC 1st Shift
as his name for the first filter. The names he chooses for the other two
filters will be
DC 2nd Shift
, and
Weekend Admin
.
4
Under
Severity
, select the severity of the events for which you want to receive alerts and logs.
For the DC 1st Shift filter, Tom selects
Warning
and
Critical
.
Click
Next
.
5
Under
Alert Category Configuration
, either check
Select All
or select the categories of events to
include in the alert filter.
Tom checks
Select All
because he wants to monitor all of the servers in his enterprise.
6
Under
Device/Group Configuration
, select the name of device or group to associate with the new
action alert filter.
Tom selects
Datacenter Servers
, the name of one of the custom groups he created previously.