
Install Guide


OpenManage
Integration with
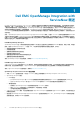
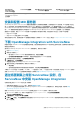
ServiceNow 功能
ServiceNow 管理员 OpenManage Integration with
ServiceNow 操作员
OpenManage Integration with
ServiceNow 用户
从 ServiceNow 删除
OpenManage Integration
应用程序
允许 不允许 不允许
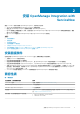
安装和配置 MID 服务器
OpenManage Integration with ServiceNow 需要在您的数据中心中安装和配置管理、设备和查找 (MID) 服务器。MID 服务器(实质上
是 Java 应用程序)在本地网络中的服务器上作为 Windows 服务或 UNIX 守护程序运行。MID 服务器可促进 ServiceNow 实例与
OpenManage Enterprise 和 SupportAssist Enterprise 应用程序之间的信息通信和交换(设备资源清册、警报和打开的支持案例详细信
息)。MID 服务器能够通过数据中心网络访问 OpenManage Enterprise 和 SupportAssist Enterprise 应用程序,这一点很重要。
要安装 MID 服务器,请在 ServiceNow 中配置 MID 服务器用户并分配用户角色,然后使用以下方法之一安装 MID 服务器:
• 作为 Windows 服务。
• 作为 Windows 系统上的单个 MID 服务器。
有关在数据中心下载、安装和配置 MID 服务器的详细信息,请参阅 ServiceNow 文档,网址为:https://www.servicenow.com/。
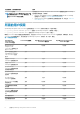
下载 OpenManage Integration with ServiceNow
保留您手边的 Dell EMC PowerEdge 服务器的服务标签。建议您使用服务标访问 Dell 支持网站上的所有支持。这确保您为您的平台下
载相应版本的软件。
要下载 OpenManage Integration with ServiceNow 安装程序包,请执行以下操作:
1. 访问 Dell.com/support。
2. 请执行以下操作之一:
• 输入您的 Dell EMC PowerEdge 服务器的服务标签,然后选择搜索。
• 选择浏览所有产品服务器 PowerEdge,然后选择相应型号的 PowerEdge 服务器。
3. 在您的服务器的支持页面上,选择驱动程序和下载。
4. 从类别列表中,选择系统管理。
将会显示支持的 OpenManage Integration with ServiceNow 版本。
5. 要在文件系统上下载安装程序包,请执行以下操作之一:
• 单击下载。
• 选中此复选框以将该软件添加到您的下载列表中,然后单击下载的选定文件。
下载的 .tar.gz 文件包含一个更新集(.xml 文件)、一个连接器 .jar 文件、一个自述文件和一个安装指南。有关在 ServiceNow 实例中
安装 OpenManage Integration 应用程序的详细信息,请参阅 安装 OpenManage Integration with ServiceNow。
通过将更新集上传到 ServiceNow 实例,在
ServiceNow 中安装 OpenManage Integration
在将更新集上传到 ServiceNow 实例之前,请确保:
• 具有必要用户权限的 ServiceNow 用户。请参阅所需的用户权限。
• 从 Dell EMC 支持站点下载并提取 OpenManage Integration with ServiceNow 安装程序文件。有关更多信息,请参阅 下载
OpenManage Integration with ServiceNow。
要将 OpenManage Integration with ServiceNow 更新集上传到 ServiceNow 实例中,请执行以下操作:
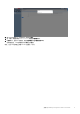
1. 在 ServiceNow 实例中,在“导航”筛选器中输入 System Update Sets,然后选择检索的更新集。
此时将显示检索的更新集页面。
2. 在相关链接下,单击从 XML 导入更新集。
3. 在导入 XML 页面上,单击选择文件并转到已提取 OpenManage Integration with ServiceNow 安装程序文件的文件系统,然后选
择 .xml 更新集。
安装 OpenManage Integration with ServiceNow 7