Dell EMC OpenManage Integration with ServiceNow 1.
註、警示與警告 註: 「註」表示可以幫助您更有效地使用產品的重要資訊。 警示: 「警示」表示有可能會損壞硬體或導致資料遺失,並告訴您如何避免發生此類問題。 警告: 「警告」表示可能的財產損失、人身傷害或死亡。 © 2020 Dell Inc. 或其子公司。版權所有,翻印必究。Dell、EMC 與其他商標均為 Dell Inc.
目錄 章 1: Dell EMC OpenManage Integration with ServiceNow 概觀........................................................... 4 新增的內容............................................................................................................................................................................ 5 章 2: 安裝 OpenManage Integration with ServiceNow......................................................................... 6 相容性比較表....................................................................................
1 Dell EMC OpenManage Integration with ServiceNow 概觀 Dell EMC OpenManage Integration with ServiceNow 可協助企業級組織弭平服務與 Operations Management 程序間的任何鴻溝,改進 業務關鍵作業的效率。這套軟體為 (ServiceNow 平台內的) 原生應用程式,可為 OpenManage Enterprise (基礎架構管理功能) 與 ServiceNow (服務和營運管理功能) 提供無縫介面。OpenManage Enterprise 是一對多的系統管理主控台,可為 PowerEdge 模組化基 礎結構、機架和立式伺服器提供全方位的整合生命週期管理。OpenManage Integration 提供的自動化功能可在 OpenManage Enterprise 與 ServiceNow 之間傳輸裝置清查資訊和活動,因此有助於服務管理團隊快速偵測、診斷和解決會影響業務服務及 IT 基礎 結構健全狀態的問題。 此外,OpenManage Integration with ServiceNow 整合
● SupportAssist Enterprise 整合:從受監控伺服器的一或多個 SupportAssist Enterprise 例項將支援案例匯入 ServiceNow 例項,並自 動為對應的支援案例建立事件。 ● OpenManage Integration 會使用 OpenManage Enterprise 和 SupportAssist Enterprise 應用程式所提供的 REST API,來擷取伺服器 清查資訊、活動和 Dell EMC 支援案例。 主題: • 新增的內容 新增的內容 ● 支援與多個 OpenManage Enterprise 和 SupportAssist Enterprise 例項的整合。 ● 組態管理資料庫 (CMDB) 整合: ○ 定期和依需求同步處理詳細的伺服器清查。例如 CPU、記憶體、儲存控制器、實體和虛擬磁碟、風扇、韌體版本。 ○ 伺服器和相關伺服器元件的自動建立組態項目 (CI) 和 CI 關係。 ○ 使用立即可用的 CMDB CI 伺服器類別儲存 PowerEdge 伺服器資訊。 ● 支援保固監控。 ● 新的平台支援: ○ ServiceNow 紐
2 安裝 OpenManage Integration with ServiceNow 若要在 ServiceNow 例項中安裝 OpenManage Integration,請執行下列步驟: ● 從 Dell EMC 支援網站下載 OpenManage Integration 安裝程式套裝。 ● 上傳 OpenManage Integration 更新分割集以安裝 OpenManage Integration。 ● 在 MID 伺服器上部署連接器 .jar 檔案,分別從 OpenManage Enterprise 和 SupportAssist Enterprise 擷取清查資訊、警示和 Dell EMC 支援案例。 ● 在 ServiceNow 中設定 OpenManage Enterprise 和 SupportAssist Enterprise 的例項。 若要解除安裝舊版的 OpenManage Enterprise with ServiceNow 1.
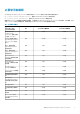
必要使用者權限 OpenManage Integration with ServiceNow 應用程式會在 ServiceNow 例項中安裝下列使用者角色集合: ● x_310922_omisnow.OMISNOW Operator,適用於 OpenManage Integration 操作員角色。 ● x_310922_omisnow.OMISNOW User,適用於 OpenManage Integration 使用者角色。 請務必為 ServiceNow 使用者指派適當角色和權限,以便使用 OpenManage Integration with ServiceNow 應用程式。如有需要,您可 以在 ServiceNow 中建立其他使用者,並為其指派 OpenManage Integration 操作員和使用者角色。 表 2.
表 2.
● 按一下下載。 ● 選取將軟體新增至下載清單的核取方塊,然後按一下已下載的所選檔案。 已下載的 DELL_EMC_OpenManage_Integration_1.1_ServiceNow_288_A00.tar.gz 檔案包含一個更新分割集 (.xml 檔 案)、一個連接器 .jar 檔案、一個讀我檔案、一個安裝指南、一個使用者授權合約 (.
進度會顯示在更新分割集認可對話方塊。在成功完成更新分割集認可後,關閉對話方塊,更新分割集的狀態欄位會更新為已認 可。 上傳的更新分割集會列在系統更新分割集 > 已擷取的更新分割集下方。如需更新分割集傳輸的詳細資訊,請前往以下網址參閱 ServiceNow 文件:https://www.docs.servicenow.com/。 在 MID 伺服器上部署 OpenManage Integration 連接 器 .JAR 若要啟用 OpenManage Enterprise 與 ServiceNow 和 SupportAssist Enterprise 與 ServiceNow 之間的通訊,您必須在 Management, Instrumentation, and Discovery (MID) 伺服器上部署連接器 .jar。 在 MID 伺服器上部署連接器 .
3 升級至 OpenManage Integration with ServiceNow 1.1 版 ● 擁有必要使用者權限的 ServiceNow 使用者。請參閱必要使用者權限 第頁的 7。 如需在 ServiceNow 例項中變更 Application 領域的詳細資訊,請前往以下網址參閱 ServiceNow 文件: https://docs.servicenow.com/ 若要使用 ServiceNow (OMISNOW) 升級 OpenManage Integration,請執行下列步驟: 1. 執行指令檔 stop_jobs.js 以停止裝置同步和活動同步的排定工作,並根據警示規則停止自動建立警示。 a. 前往您解壓縮 DELL_EMC_OpenManage_Integration_ServiceNow_Background_Scripts 包含指令檔之資料夾的檔 案系統。 b. 開啟並複製 stop_jobs.js 內容。 c. 在瀏覽篩選器中,選取系統定義 > 指令檔 - 背景。 d. 在執行指令檔方塊中,複製 stop_jobs.js 內容,選取全域領域,然後按一下執行指令檔。 2.
● ● ● ● ● ● 讀取和刪除表 x_317119_omisnow_openmanage_enterprise_connection_profile 的權限。 讀取和刪除表 x_317119_omisnow_supportassist_enterprise_connection_profile 的權限。 讀取和更新表 x_310922_omisnow_properties 的權限。 讀取、建立、更新和刪除表 sysauto_script 的權限。 讀取、建立、更新和刪除表 cmdb_ci_outofband_device 的權限。 讀取表 sysevent-read 的權限。 您可以手動或執行指令檔 upgrade_permissions.js 以啟用存取表格必要的權限。若要啟用使用指令檔的權限,請執行下列 步驟: a. 前往您解壓縮 DELL_EMC_OpenManage_Integration_ServiceNow_Background_Scripts 包含指令檔之資料夾的檔 案系統。 b. 開啟並複製 upgrade_permissions.js 內容。 c.
4 解除安裝 OpenManage Integration with ServiceNow 擁有必要使用者權限的 ServiceNow 使用者。請參閱必要使用者權限 第頁的 7。 您必須將 ServiceNow 的 Application 領域變更為: ● (選用) 全域 Application 領域,才能刪除活動、警示和事件等 OpenManage Integration 記錄。 ● Dell EMC OpenManage Enterprise Application 領域,才能刪除 OpenManage Integration。 如需在 ServiceNow 例項中變更 Application 領域的詳細資訊,請前往以下網址參閱 ServiceNow 文件:https:// www.docs.servicenow.com/ 若要使用 ServiceNow (OMISNOW) 解除安裝 OpenManage Integration,請執行下列步驟: 1. 執行指令檔 stop_jobs.js 以停止裝置同步和活動同步的排定工作,並根據警示規則停止自動建立警示。 a.
a. 前往您解壓縮 DELL_EMC_OpenManage_Integration_ServiceNow_Background_Scripts 包含指令檔之資料夾的檔 案系統。 b. 開啟並複製 uninstall_DeleteServerRecords.js 內容。 c. 在瀏覽篩選器中,選取系統定義 > 指令檔 - 背景。 d. 在執行指令檔方塊中,複製 uninstall_DeleteServerRecords.js 內容,然後在 x_310922_omisnow 領域中執行指令 檔。 在繼續進行下一個步驟之前,請等待確認沒有記錄要刪除的訊息。 5. 執行指令檔 uninstall_deleterecords.js 以刪除 JAR 檔案、組態項目和記錄檔。 a. 前往您解壓縮 DELL_EMC_OpenManage_Integration_ServiceNow_Background_Scripts 包含指令檔之資料夾的檔 案系統。 b. 開啟並複製 uninstall_deleterecords.js 內容。 c. 在瀏覽篩選器中,選取系統定義 > 指令檔 - 背景。 d.
5 其他資源 表 3. 其他資源 文件 說明 可用性 Dell EMC OpenManage Integration with ServiceNow 提供使用和故障診斷 OpenManage Integration with ServiceNow 的資訊。 Dell EMC OpenManage Integration with ServiceNow 提供 OpenManage Integration with ServiceNow 之新功能、已知問題和因應措施的資訊。 1. 前往 Dell.com/OpenManageManuals。 2. 按一下 Dell EMC OpenManage Integration with ServiceNow,選取所需應用程式版本。 3.
6 從 Dell EMC 支援網站存取支援內容 使用直接連結,前往 Dell EMC 支援網站或使用搜尋引擎,存取與一系列系統管理工具相關的支援內容。 ● 直接連結: ○ ○ ○ ○ ○ ○ Dell EMC 企業系統管理和 Dell EMC 遠端企業系統管理—https://www.dell.com/esmmanuals Dell EMC 虛擬化解決方案—https://www.dell.com/SoftwareManuals Dell EMC OpenManage—https://www.dell.com/openmanagemanuals iDRAC—https://www.dell.com/idracmanuals Dell EMC OpenManage Connections 企業系統管理—https://www.dell.com/OMConnectionsEnterpriseSystemsManagement Dell EMC 檢修性工具—https://www.dell.com/serviceabilitytools ● Dell EMC 支援網站: 1. 前往 https://www.
7 聯絡 Dell EMC Dell EMC 提供了一些線上和電話支援與服務的選擇。服務的提供因國家/地區和產品而異,某些服務可能在您所在地區並不提供。 註: 如果無法連線網際網路,則可以在購買發票、包裝單、帳單或 Dell EMC 產品目錄中找到聯絡資訊。 如有銷售、技術支援或客戶服務的問題要聯絡 Dell EMC: 1. 前往 Dell.com/support。 2. 從頁面右下角的清單中選取偏好的國家或地區。 3.