
Users Guide
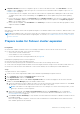
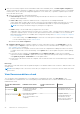
Table Of Contents
- Dell EMC OpenManage Integration Version 2.1 with Microsoft Windows Admin Center User’s Guide
- Contents
- Overview of OpenManage Integration with Microsoft Windows Admin Center
- Getting started with OpenManage Integration with Microsoft Windows Admin Center
- Ports required by Dell EMC OpenManage Integration with Microsoft Windows Admin Center
- Manage Dell EMC PowerEdge Servers
- Manage Failover clusters, Azure Stack HCI, and Windows Server HCI clusters
- View iDRAC details of the PowerEdge servers and nodes of HCI and Failover clusters
- Update PowerEdge servers and nodes of Windows Server HCI, Azure Stack HCI, and Failover clusters using OpenManage Integration extension
- Integrated deploy and update of Azure Stack HCI clusters
- Full Stack Cluster-Aware Updating for Azure Stack HCI clusters using OpenManage Integration snap-in
- Manage CPU cores in clusters or individual nodes
- Add nodes to existing clusters
- Troubleshooting and Frequently asked questions
- Identifying the generation of your Dell EMC PowerEdge server
- Contacting Dell EMC
- Glossary
- Appendix

6. Compliance Results section shows compliance reports of cluster nodes and new nodes. Click View Details to see the
compliance report or Export to export the report in CSV format. For more information about compliance report, see View
compliance report on page 25.
● If cluster nodes are non-compliant, ensure that the cluster nodes are compliant before adding new nodes in the cluster.
To update cluster nodes, exit the wizard and go to the Update tab for cluster update using cluster-aware updating
method.
● If new nodes are non-compliant, click View Details in the Compliance Result to verify the non-compliant components
and then click Finish to update the new nodes and keep them ready for cluster expansion. Click Update in progress-
View to see the update status.
● If new nodes are compliant, click View Details in the Summary to see the list of nodes that will be prepared for cluster
expansion and then click Exit.
Next steps
After both new nodes and cluster nodes are updated, navigate to the Windows Admin Center workflow to add new nodes to the
existing cluster.
NOTE: Before adding a node to the cluster, ensure that you configure the host OS network to the new nodes same as the
cluster nodes. For more information about configuring host OS networks, see Scalable Architecture for Dell EMC Solutions
for Azure Stack HCI.
Prepare nodes for Failover cluster expansion
Prerequisites
● Ensure that 'OMIWAC Premium License for PowerEdge' is installed on cluster nodes as well as the new node.
● For new nodes with SAS-RAID_Driver, ensure the followings:
○ Set the SATA controller to RAID mode.
○ Set the NVMe PCIe SSDs to RAID mode.
For more information about setting the RAID mode, see Appendix
Planning before preparing a node for cluster expansion:
● Place the new node in a rack and cable it properly.
● Ensure the same operating system is installed on the new node as on the existing cluster nodes.
● Connect the node using the Windows Admin Center and configure the basic settings such as username, domain, and so on.
● Ensure new nodes are in the same domain as of cluster nodes and they are accessible by the domain administrator.
Steps
To prepare nodes for cluster expansion:
1. Connect to the cluster using Windows Admin Center and launch OpenManage Integration extension.
2. Go to Configure tab and then click Expand Cluster on the left side.
3. In the Expand Cluster window, click Add Nodes.
4. In the Expand Cluster window, under Select compatible nodes, list of nodes are displayed. The list fetches all nodes
available on the Server Manager page in the Windows Admin Center.
a. Select any nodes that you want to add to the cluster. You can also search any node using the search box or click select
all check box to select all nodes. Ensure that new nodes are not part of any cluster.
NOTE:
Total number of nodes supported in a cluster is 16. For example, for a cluster with existing 2 nodes, you can
select up to 14 nodes for cluster expansion.
b. After nodes are selected, click Check in Recommendations and then click View Details to see recommended
and not-recommended nodes for cluster expansion. For more information about Recommendations check, see View
Recommendations check on page 42.
c. Click Check in License Availability to verify whether new nodes and cluster nodes have 'OMIWAC Premium License for
PowerEdge' installed.
Before moving for update compliance, ensure new nodes considered from recommendations check and cluster nodes
have OMIWAC premium license installed.
Add nodes to existing clusters
41