
Users Guide


• Vous ne pouvez pas supprimer un prol de référence s'il est utilisé dans une source de mise à jour.
REMARQUE : Les étapes sont les mêmes quel que soit le type de prol de référence que vous supprimez.
Étape
Sélectionnez le prol de référence à supprimer, puis cliquez sur Supprimer.
Étape suivante
Pour acher les modications apportées, actualisez la page Prol de référence.
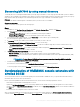
About hypervisor prole (for SCVMM users)
A hypervisor prole contains a customized WinPE ISO (WinPE ISO is used for hypervisor deployment), host group, and host prole taken
from SCVMM, and LC drivers for injection. Only OMIMSSC console extension for SCVMM users, can create and manage hypervisor
proles.
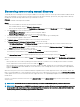
Creating hypervisor prole
Create a hypervisor prole and use the prole to deploy hypervisors.
Prérequis
• Update the WinPE ISO image, and have access to the share folder where the image is saved. For information about updating the
WinPE image, see WinPE update.
• Create a host group, and host prole or physical computer prole, in SCVMM. For information about creating host groups in SCVMM,
see Microsoft documentation.
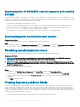
Étapes
1 In OMIMSSC, perform any one of the following tasks:
• In the OMIMSSC dashboard, click Create Hypervisor Proles.
• In the left navigation pane, click Proles and Templates, Hypervisor Prole, and then click Create.
The Hypervisor Prole Wizard is displayed.
2 In the Welcome page click Next.
3 In Hypervisor Prole, provide a name and description of the prole, and then click Next.
4 In the SCVMM Information page,
a For SCVMM Host Group Destination, select an SCVMM host group from the drop-down menu to add the host into this group.
b From SCVMM Host Prole/Physical Computer Prole, select a host prole or physical computer prole from SCVMM that
includes conguration information to be applied on servers.
In SCVMM, select one of the following disk partition methods in a Physical Computer Prole:
• When booting to UEFI mode, select GUID Partition Table (GPT) option.
• When booting to BIOS mode, select Master Board Record (MBR) option.
5 In WinPE Boot Image Source, provide the following details, and click Next.
a For Network WinPE ISO Name, provide the share folder path having the updated WinPE le name. For updating WinPE le, see
WinPE update.
b For Credential Prole, select the credentials having access to share folder having the WinPE le.
c (Optional) To create a windows credential prole, click Create New. For information about creating credential prole, see
Creating credential prole.
6 (Optional) To enable LC driver injection, perform the following steps:
REMARQUE
: Ensure that you select Enable Dell Lifecycle Controller Drivers Injection check-box, because the latest
operating system driver packs for NIC cards are available in the latest operating system drivers.
a Select the operating system that you want to deploy so that the relevant drivers are selected.
22
Managing proles