
Install Guide


Taking back up of OMIMSSC Appliance
Prerequisite
• Ensure that there are no jobs running in OMIMSSC.
About this task
Perform the following steps to back up OMIMSSC Appliance:
Steps
1 Launch the OMIMSSC Appliance VM.
2 Provide the Admin password, and press Enter.
The OMIMSSC Appliance is displayed.
3 Navigate to Backup Appliance Data, and press Enter key.
Restore OMIMSSC Appliance
Restore OMIMSSC Appliance data in any of the following scenarios:
• Before upgrading to a new version of OMIMSSC
• Before migrating from one OMIMSSC Appliance to another OMIMSSC Appliance.
Restoring OMIMSSC Appliance
Prerequisite
Ensure that you restore the data before performing any operations on the new OMIMSSC Appliance.
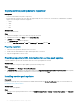
About this task
Perform the following steps for restoring old OMIMSSC Appliance data on a fresh OMIMSSC Appliance.
Steps
1 From the OMIMSSC admin portal, click Settings, and then click Restore Appliance.
The Restore page is displayed.
2 In IP Address, provide the IP address of the old OMIMSSC Appliance, and click Restore.
The information is restored to new OMIMSSC Appliance.
To view the status of restore after the OMIMSSC Appliance restarts:
a Log in to OMIMSSC admin portal.
NOTE
: It is recommended that you wait for few minutes before you log in so that all services are initiated.
b Expand Settings, and then click Logs.
c Download the dlciappliance_main.log le, and search for the following message for a successful restore:
Successfully restored OMIMSSC Appliance
Next steps
Perform the following after restoring the old OMIMSSC Appliance.
• It is recommended that you re-create the scheduled jobs after restoring old OMIMSSC Appliance.
• For the hypervisor proles exported from earlier version of OMIMSSC, ensure that you edit the prole to provide the ISO le path and
Windows credential prole.
22
Managing OMIMSSC and its components