
Users Guide
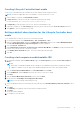
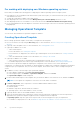
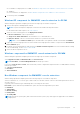

Table Of Contents
- OpenManage Integration Version 7.0 for Microsoft System Center User’s Guide
- Contents
- Introduction
- About OMIMSSC components
- About Admin Portal
- Launching OMIMSSC from enrolled MSSC console
- Use cases
- Profiles
- Launching Configuration and Deployment
- Discovering servers and synchronizing with MSSC console
- About reference server configuration
- Discovering servers in OMIMSSC
- Server discovery in OMIMSSC console extension for SCCM
- Server discovery in OMIMSSC console extension for SCVMM
- System requirements for managed systems
- Discovering servers using auto discovery
- Discovering servers using manual discovery
- Synchronizing OMIMSSC console extensions with enrolled SCCM
- Synchronizing OMIMSSC console extension with enrolled SCVMM
- Synchronizing with enrolled MSSC
- Resolving synchronization errors
- Deleting servers from OMIMSSC
- Launching iDRAC console
- OMIMSSC licensing
- Operational Template
- Preparing for deployment
- Managing Operational Template
- Integration with Dell Repository Manager(DRM)
- Maintenance
- Viewing information in OMIMSSC
- Troubleshooting
- Deploy option not visible in task sequence
- Duplicate VRTX chassis group gets created
- Empty cluster update group does not get deleted during autodiscovery or synchronization
- Failure of creation of update source
- Failure of firmware update because of job queue being full
- Failure of firmware update on cluster update group
- Failure of firmware update on 11th generation of servers
- Failure of firmware update while using DRM update source
- Failure of scheduled job on an update group
- Failure to apply Operational Template
- Failure to access CIFS share using hostname
- Failure to connect to FTP using system default update source
- Failure to create a repository during a firmware update
- Failure to delete a custom update group
- Failure to display Jobs and Logs
- Failure to export LC logs in CSV format
- Failure to export server profiles
- Failure to display Dell EMC logo in OMIMSSC Admin Portal
- Failure to view LC logs
- Firmware update on a few components irrespective of the selection
- Hypervisor deployment failure
- Hypervisor deployment failure due to driver files retained in library share
- Hypervisor deployment failure for 11th generation PowerEdge blade servers when using Active Directory
- Incorrect credentials during discovery
- IG installation issue while running multiple instances of the installer on the same server
- Importing server profile job gets timed out after two hours
- Latest inventory information is not displayed even after firmware update
- SCVMM error 21119 while adding servers to active directory
- Appendix
- Accessing support content from the Dell EMC support site

Creating Lifecycle Controller boot media
Create a zero-touch deployment boot media from your task sequence media, using this feature.
NOTE: This feature is applicable only for the OMIMSSC console extension for SCCM.
1. Launch OMIMSSC, and then click Boot Media Creation.
2. In Image Source provide the ISO file that contains the operating system image.
For more information, see Creating a task sequence media bootable ISO.
3. In Output File, provide the name of the ISO file, which is an unattended ISO file.
4. (Optional) to navigate to the Jobs and logs page after the job has started, select the Go to the Job List check box.
5. Click Update to save the output file in ISO share.
Setting a default share location for the Lifecycle Controller boot
media
To set a default share location for the Lifecycle Controller boot media:
1. In Configuration Manager select Administration > Site Configuration > Sites
2. Right-click <site server name> and select Configure Site Components, and then select Out of Band Management.
The Out of Band Management Component Properties window is displayed.
3. Click the Lifecycle Controller tab.
4. Under Default Share Location for Custom Lifecycle Controller Boot Media, click Modify to modify the default share
location of the custom Lifecycle Controller boot media.
5. In the Modify Share Information window, enter a new share name and share path.
6. Click OK.
Creating a task sequence media bootable ISO
1. In Configuration Manager under Software Library, right-click Task Sequences, and select Create Task Sequence
Media.
NOTE:
● Ensure that you manage and update the boot image across all distribution points before starting this wizard.
● OMIMSSC: OMIMSSC does not support the Standalone Media method to create Task Sequence Media.
2. From the Task Sequence Media Wizard, select Bootable Media and click Next.
3. Select CD/DVD Set, and click Browse and select the location to save the ISO image.
4. Click Next.
5. Clear the Protect Media with a Password check box and click Next.
6. Browse and select PowerEdge server Deployment Boot Image.
NOTE: Use the boot image created using DTK only.
7. Select the distribution point from the drop-down menu, and select the Show distribution points from child sites check
box.
8. Click Next.
The Summary screen appears with the task sequence media information.
9. Click Next.
The progress bar is displayed.
10. On completion, close the wizard.
Operational Template
31