
Install Guide
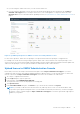
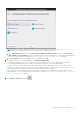
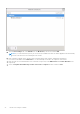
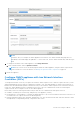
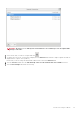
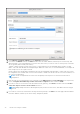
Table Of Contents
- OpenManage Integration for VMware vCenter Version 5.1 Installation Guide
- Introduction
- Install and configure OMIVV
- Prerequisite checklist
- Download OpenManage Integration for VMware vCenter
- Deploy OMIVV OVF using vSphere Client (HTML-5)
- Generate a Certificate Signing Request (CSR)
- Upload HTTPS certificate
- Restore default HTTPS certificate
- Configure deployment mode
- Register new vCenter server
- Configure OMIVV appliance
- Reconfigure OMIVV after upgrading registered vCenter version
- Manage backup and restore
- Update OMIVV appliance and repository location
- Upgrade OMIVV appliance using RPM
- Upgrade OMIVV appliance using backup and restore
- Unregister OpenManage Integration for VMware vCenter
- Recover OMIVV after un-registration
- Configure OMIVV appliance using initial configuration wizard
- Accessing documents from the Dell EMC support site
- Related Documentation
- Contacting Dell

WARNING: Do not use "+" to add any new network interface. It is mandatory to use the vSphere Edit
Settings to add a NIC.
6.
Select the NIC that you want to configure and click
.
7. To identify the correct NIC, use the MAC ID displayed on the Ethernet tab, and then compare it against the MAC ID
displayed in the vSphere Client (HTML-5).
Ensure that you do not change the default MAC address that is listed in the Ethernet tab.
8. Click the General tab and select the Automatically connect to this network when it is available check box.
9. Click the IPv4 Settings tab and do the following:
Install and configure OMIVV
29