
Install Guide
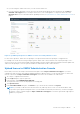
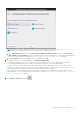
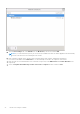
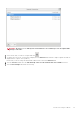
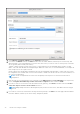
Table Of Contents
- OpenManage Integration for VMware vCenter Version 5.1 Installation Guide
- Introduction
- Install and configure OMIVV
- Prerequisite checklist
- Download OpenManage Integration for VMware vCenter
- Deploy OMIVV OVF using vSphere Client (HTML-5)
- Generate a Certificate Signing Request (CSR)
- Upload HTTPS certificate
- Restore default HTTPS certificate
- Configure deployment mode
- Register new vCenter server
- Configure OMIVV appliance
- Reconfigure OMIVV after upgrading registered vCenter version
- Manage backup and restore
- Update OMIVV appliance and repository location
- Upgrade OMIVV appliance using RPM
- Upgrade OMIVV appliance using backup and restore
- Unregister OpenManage Integration for VMware vCenter
- Recover OMIVV after un-registration
- Configure OMIVV appliance using initial configuration wizard
- Accessing documents from the Dell EMC support site
- Related Documentation
- Contacting Dell

● DNS requirements—The OMIVV supports DNS configuration for only one network. For more information about DNS
configuration, go to step 9 (b) in this topic.
1. Turn off the OMIVV appliance.
2. Edit the VM settings using the vSphere Client (HTML-5) and add the additional Network adapter. To edit the VM settings,
right-click VM, and then click Edit Settings.
3. Click ADD NEW DEVICE, select Network Adapter.
a.
Select the appropriate network for the NIC, and then select the Connect At Power On check box.
b. Select the VMXNET3 adapter type from the drop-down menu.
NOTE: OMIVV supports VMXNET3 type of NIC.
4. Turn on the OMIVV appliance. Log in as an administrator (the default username is Admin), and then press Enter.
5. On the OpenManage Integration for VMware vCenter Virtual Appliance Setup utility, select Network Configuration.
The Network Connections page displays two NICs.
28
Install and configure OMIVV