
Install Guide
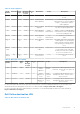

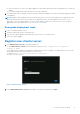
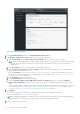
Table Of Contents
- OpenManage Integration for VMware vCenter Version 5.1 Installation Guide
- Introduction
- Install and configure OMIVV
- Prerequisite checklist
- Download OpenManage Integration for VMware vCenter
- Deploy OMIVV OVF using vSphere Client (HTML-5)
- Generate a Certificate Signing Request (CSR)
- Upload HTTPS certificate
- Restore default HTTPS certificate
- Configure deployment mode
- Register new vCenter server
- Configure OMIVV appliance
- Reconfigure OMIVV after upgrading registered vCenter version
- Manage backup and restore
- Update OMIVV appliance and repository location
- Upgrade OMIVV appliance using RPM
- Upgrade OMIVV appliance using backup and restore
- Unregister OpenManage Integration for VMware vCenter
- Recover OMIVV after un-registration
- Configure OMIVV appliance using initial configuration wizard
- Accessing documents from the Dell EMC support site
- Related Documentation
- Contacting Dell

● If the verification is successful, the OMIVV appliance restarts and the deployment mode is changed after you confirm the
change.
● If the required deployment mode is already set, a message is displayed.
5. If the deployment mode is changed, confirm the changes, and then the appliance is restarted to enable the deployment mode
to be updated.
NOTE: During the OMIVV appliance bootup, the allocated system resources are verified against the set deployment mode.
If the allocated system resources are less than the set deployment mode, the OMIVV appliance does not boot to the
login page. To boot the OMIVV appliance, close the OMIVV appliance, update the system resources to the existing set
deployment mode, and complete the downgrade deployment mode task.
Downgrade deployment mode
1. Log in to the Administration Console.
2. Change the deployment mode to the required level.
3. Shut down the OMIVV appliance and change the system resources to the required level.
4. Turn on the OMIVV appliance.
Register new vCenter server
1. Open Administration Console from a supported browser.
To open Administration Console, start a web browser and enter https://<ApplianceIP or Appliance
hostname or FQDN>.
The IP address is the IP address of the appliance VM and not the ESXi host IP address. The Administration Console can be
accessed by using the URL mentioned at the top of the console.
For example: Https://10.210.126.120 or Https://myesxihost
The URL is not case-sensitive.
Figure 1. Administration Console
2. In the OMIVV Administration Console login window, enter password, and then click Login.
Install and configure OMIVV
19