
Install Guide

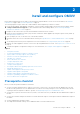

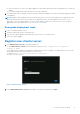
Table Of Contents
- OpenManage Integration for VMware vCenter Version 5.1 Installation Guide
- Introduction
- Install and configure OMIVV
- Prerequisite checklist
- Download OpenManage Integration for VMware vCenter
- Deploy OMIVV OVF using vSphere Client (HTML-5)
- Generate a Certificate Signing Request (CSR)
- Upload HTTPS certificate
- Restore default HTTPS certificate
- Configure deployment mode
- Register new vCenter server
- Configure OMIVV appliance
- Reconfigure OMIVV after upgrading registered vCenter version
- Manage backup and restore
- Update OMIVV appliance and repository location
- Upgrade OMIVV appliance using RPM
- Upgrade OMIVV appliance using backup and restore
- Unregister OpenManage Integration for VMware vCenter
- Recover OMIVV after un-registration
- Configure OMIVV appliance using initial configuration wizard
- Accessing documents from the Dell EMC support site
- Related Documentation
- Contacting Dell

● The vCenter server is running.
● You determine the location of the OMIVV installation directory.
● The OMIVV and vCenter server are on the same network.
● There is a route between the vCenter, OMIVV, and the iDRAC networks, if vCenter, OMIVV, and iDRAC are connected to
different networks. This is applicable only If the OMIVV appliance is not configured with two NICs.
● The VMware vSphere environment meets virtual appliance system requirements, port access, clock synchronization, and
listening port requirements.
NOTE: The virtual appliance functions as a regular virtual machine. Any interruptions or shut downs impact overall
functionality of the virtual appliance.
Download OpenManage Integration for VMware
vCenter
Do keep the Service Tag of your Dell EMC PowerEdge server handy. It is recommended that you use the Service Tag to access
all support on the Dell Support Website. This ensures that you download the appropriate version of the software for your
platform.
To download OMIVV:
1. Go to https://www.dell.com/support.
2. Perform one of the following actions:
● Enter the Service Tag of your Dell EMC PowerEdge server, and then select search.
● Select Browse all products > Servers > PowerEdge.
3. Select the appropriate model of your PowerEdge server.
4. On the support page of your server, select Drivers & downloads.
5. From the Operating System list, select the appropriate version of VMware ESXi.
6. From the Category list, select Systems Management.
The supported version of OMIVV is displayed.
7. Click Download or select the check box to add the software to your download list.
Deploy OMIVV OVF using vSphere Client (HTML-5)
Ensure that you have downloaded and unzipped the product .zip file, DellEMC_OpenManage_Integration_<version
number>.<build number>.zip from the support website.
NOTE:
The following tasks are recommended only if you are using vSphere Client (HTML-5). If you are using Web Client,
the steps may vary.
1. Go to the locations where you have downloaded OMIVV and double-click DellEMC_OpenManage_Integration.exe to
unzip the file.
The supported client operating system version for extracting and running the exe is Windows 7 SP1 and later.
The supported server operating system version for extracting and running the exe is Windows 2008 R2 and later.
2. Accept EULA, and save the .ovf file.
3. Copy or move the .ovf file to a location accessible to the VMware vSphere host to which you upload the appliance.
4. Start the VMware vSphere Client (HTML-5).
5. In VMware vSphere Client, select a host, and in the main menu click Actions > Deploy OVF Template.
You can also right-click Host and select Deploy OVF Template.
The Deploy OVF Template wizard is displayed.
6. In the Select an OVF template window, perform the following:
a. To download the OVF package from the Internet, select URL.
b. If you want to select the OVF package from your local system, select Local file and, then click Choose Files.
c. Select the files (.mf, .ovf, and .vmdk).
d. Click Next.
16
Install and configure OMIVV