
Install Guide
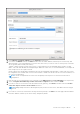
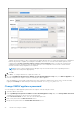
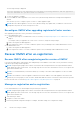

Table Of Contents
- OpenManage Integration for VMware vCenter Version 5.3 Installation Guide
- Contents
- Introduction
- Install and configure OMIVV
- Prerequisite checklist
- Download OpenManage Integration for VMware vCenter
- Deploy OMIVV OVF using vSphere Client (HTML-5)
- Generate a Certificate Signing Request (CSR)
- Upload HTTPS certificate
- Restore default HTTPS certificate
- Configure deployment mode
- Register vCenter server using a non-administrative account
- Register new vCenter server
- Configure OMIVV appliance
- Configure OMIVV appliance with two Network Interface Controllers (NICs)
- Change OMIVV appliance password
- Configure Network Time Protocol (NTP) and set local time zone
- Change hostname of OMIVV appliance
- Reboot OMIVV appliance
- Reset OMIVV appliance to factory settings
- Reconfigure OMIVV after upgrading registered vCenter version
- Recover OMIVV after un-registration
- Upgrade OMIVV appliance and repository location
- Configure OMIVV appliance using initial configuration wizard
- Accessing support content from the Dell EMC support site
- Related Documentation
- Contacting Dell
In OMIVV, perform the following steps to access the BACKUP AND RESTORE SETTINGS page using the Administration
Console:
1. Go to https:\\<ApplianceIP|hostname>.
2. In the Login dialog box, type the password.
3. In the left pane, click BACKUP AND RESTORE.
Configure backup and restore
The backup and restore function backs up the OMIVV database to a remote location (NFS and CIFS) from which it can
be restored later. The profiles, configuration, and host information are in the backup. It is recommended that you schedule
automatic backups to guard against data loss.
The following settings are saved and restored:
● Profiles
● Host inventory details
● OMIVV license
● vCenter appliance settings configured in OMIVV
● HTTP or HTTPS proxy
● Deployment mode
● Extended monitoring
● Alert management
● Backup and restore
● PHA enablement using Dell provider
The following settings are not saved and restored:
● Configuration made at virtual console (such as network configuration, time configuration, and password )
● Alerts and tasks posted to vCenters
● Alarms customization made at vCenter
● Certificates
● General settings configured at Dell EMC Administration console
● NTP settings
● Customization or setting on failure conditions for PHA
1. On the BACKUP AND RESTORE SETTINGS page, click Edit.
2. On the highlighted SETTINGS AND DETAILS area, do the following:
a. In Backup Location, type the path of the backup files.
b. In Username, enter the username.
c. In Password, enter the password.
d. In Enter the password used to encrypt backups, type the encrypted password in the box.
The encryption password can contain alphanumeric characters and the following special characters: @[]{}_+,-.:=.
e. In Verify Password, retype the encrypted password.
f. To validate the backup location and encrypt backup password, click Test.
3. To save these settings, click Apply.
4. Configure the backup schedule. See Scheduling automatic backups.
After this procedure, configure a backup schedule.
NFS requirements
The following settings are required for OMIVV while configuring NFS:
● Ensure that you have read permission to perform restore and write permission to take backup.
● For Windows NFS share, configure the following:
○ In the folder properties, click Security, ensure that Everyone have the following permissions:
■ Full control permission for backup and restore
■ Read & execute, Read, Modify, and List folder Contents permissions for RPM upgrade
○ In the folder properties, click NFS Sharing, and then click Manage NFS Sharing.
38
Upgrade OMIVV appliance and repository location