
Install Guide
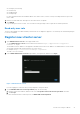
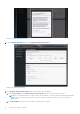
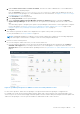
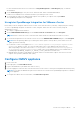
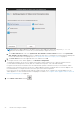
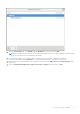
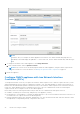
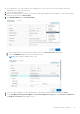
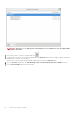
Table Of Contents
- OpenManage Integration for VMware vCenter Version 5.3 Installation Guide
- Contents
- Introduction
- Install and configure OMIVV
- Prerequisite checklist
- Download OpenManage Integration for VMware vCenter
- Deploy OMIVV OVF using vSphere Client (HTML-5)
- Generate a Certificate Signing Request (CSR)
- Upload HTTPS certificate
- Restore default HTTPS certificate
- Configure deployment mode
- Register vCenter server using a non-administrative account
- Register new vCenter server
- Configure OMIVV appliance
- Configure OMIVV appliance with two Network Interface Controllers (NICs)
- Change OMIVV appliance password
- Configure Network Time Protocol (NTP) and set local time zone
- Change hostname of OMIVV appliance
- Reboot OMIVV appliance
- Reset OMIVV appliance to factory settings
- Reconfigure OMIVV after upgrading registered vCenter version
- Recover OMIVV after un-registration
- Upgrade OMIVV appliance and repository location
- Configure OMIVV appliance using initial configuration wizard
- Accessing support content from the Dell EMC support site
- Related Documentation
- Contacting Dell

Figure 2. Dell EMC EULA agreement
4. In the vCenter Registration window, click Register a New vCenter Server.
Figure 3. vCenter Registration
5. In the Register a New vCenter Server window, perform the following substeps:
a. Under vCenter Name, in the vCenter Server IP or Hostname text box, enter the server IP or FQDN,
NOTE:
It is recommended that you register OMIVV with the VMware vCenter by using Fully Qualified Domain Name
(FQDN). Ensure that the host name of the vCenter is properly resolvable by the DNS server for FQDN-based
registrations.
b. In the Description text box, enter a description. The description is optional.
22
Install and configure OMIVV