
Install Guide
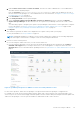
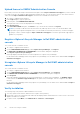
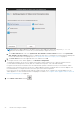
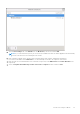
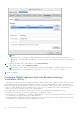
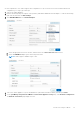
Table Of Contents
- OpenManage Integration for VMware vCenter Version 5.2 Installation Guide
- Introduction
- Install and configure OMIVV
- Prerequisite checklist
- Download OpenManage Integration for VMware vCenter
- Deploy OMIVV OVF using vSphere Client (HTML-5)
- Generate a Certificate Signing Request (CSR)
- Upload HTTPS certificate
- Restore default HTTPS certificate
- Configure deployment mode
- Register vCenter server using a non-administrative account
- Register new vCenter server
- Configure OMIVV appliance
- Configure OMIVV appliance with two Network Interface Controllers (NICs)
- Change OMIVV appliance password
- Configure Network Time Protocol (NTP) and set local time zone
- Change hostname of OMIVV appliance
- Reboot OMIVV appliance
- Reset OMIVV appliance to factory settings
- Reconfigure OMIVV after upgrading registered vCenter version
- Recover OMIVV after un-registration
- Upgrade OMIVV appliance and repository location
- Configure OMIVV appliance using initial configuration wizard
- Accessing documents from the Dell EMC support site
- Related Documentation
- Contacting Dell

For more information about the access restrictions for Plug-In Management or Client Plug-Ins page, see VMware
documentation.
4. On the Client Plug-Ins page, verify the version, and ensure that OMIVV is installed and enabled.
If OMIVV is not enabled, wait for sometime and then log out and log in from vCenter.
5. To confirm that the OMIVV icon appears inside vSphere client (HTML-5), in vSphere Client, expand Menu.
The OpenManage Integration icon is displayed.
Unregister OpenManage Integration for VMware vCenter
Ensure that you do not unregister OMIVV from the vCenter server when an inventory, warranty, or deployment job is running.
If you have enabled Proactive HA on clusters, ensure that Proactive HA is disabled on the clusters. For disabling Proactive
HA, access the Proactive HA Failures and Responses screen of a cluster by selecting Configure > Services > vSphere
Availability, and then click Edit. To disable Proactive HA, in the Proactive HA Failures and Responses screen, clear the
check box against Dell Inc provider.
To remove OpenManage Integration for VMware vCenter, unregister OMIVV from the vCenter server by using the
Administration Console.
1. Go to https://<ApplianceIP/hostname/>.
2. On the VCENTER REGISTRATION page, in the vCenter Server IP or Hostname table, click Unregister.
NOTE: Ensure to select the correct vCenter because OMIVV can be associated with more than one vCenter.
3. To confirm the unregistration of the selected vCenter server, in the UNREGISTER VCENTER dialog box, click Unregister.
NOTE:
After unregistering OMIVV, log out and log in from the vSphere Client (HTML-5). If the OMIVV icon is still
visible, then restart the Client services for both vSphere Client (HTML-5) and Web Client (FLEX).
Configure OMIVV appliance
1. Power on the VM.
2. In the right-pane, click Launch Web Console.
3. Log in as an administrator (the default user name is admin).
4. If you are logging in for the first time, follow the instructions on the screen to set the password (Admin and ReadOnly users).
NOTE:
If you forget the administrator password, it cannot be recovered from the OpenManage Integration for VMware
vCenter appliance.
5. To configure the OMIVV time zone information, click Date/Time Properties.
Install and configure OMIVV
25