
Install Guide

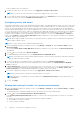
Table Of Contents
- OpenManage Integration for VMware vCenter Version 4.1 Web Client Installation Guide
- Introduction
- OpenManage Integration for VMware vCenter licensing
- Important notes for reference
- Hardware requirements
- Software requirements
- Port information
- Prerequisite checklist
- Installing, configuring, and upgrading OMIVV
- Deploying OMIVV OVF using vSphere web client
- Registering vCenter server by non-administrator user
- Registering OpenManage Integration for VMware vCenter and importing license file
- Upgrading registered vCenter
- Verifying installation
- Migrating from earlier version to 4.1
- Recovering OMIVV after unregistering earlier version of OMIVV
- Appliance configuration for VMware vCenter
- Accessing documents from the Dell EMC support site
- Related Documentation

Configuring warranty expiration notification settings
1. In OpenManage Integration for VMware vCenter, on the Manage > Settings tab, under Appliance Settings, click
Warranty Expiration Notification.
2. Expand Warranty Expiration Notification to view the following:
● Warranty Expiration Notification—whether the setting is enabled or disabled
● Warning—number of days for the first warning setting
● Critical—number of days for the critical warning setting
3. To configure warranty expiration thresholds for warning about warranty expiration, click the icon at the right side of
Warranty Expiration Notification.
4. In the Warranty Expiration Notification dialog box, do the following:
a. If you want to enable this setting, select the Enable warranty expiration notification for hosts.
Selecting the check box enables warranty expiration notification.
b. Under Minimum Days Threshold Alert, do the following:
i. In the Warning drop-down list, select the number of days before you want to be warned of the warranty expiration.
ii. In the Critical drop-down list, select the number of days before you want to be warned of the warranty expiration.
5. Click Apply.
Setting up firmware update repository
You can set up the firmware update repository on the OMIVV Settings tab.
1. In OpenManage Integration for VMware vCenter, on the Manage > Settings tab, under Appliance Settings at the right
side of Firmware Update Repository, click the
icon.
2. In the Firmware Update Repository dialog box, select one of the following:
● Dell Online—you can access the location that uses the firmware update repository of Dell (Ftp.dell.com). The
OpenManage Integration for VMware vCenter downloads selected firmware updates from the Dell repository and updates
the managed hosts.
NOTE: Based on the network settings, enable proxy settings if network needs proxy.
● Shared Network Folder—you can have a local repository of the firmware in a CIFS-based or NFS-based network share.
This repository can either be a dump of Server Update Utility (SUU) that Dell releases periodically or a custom repository
created using DRM. This network share should be accessible by OMIVV.
NOTE: If you are using CIFS share, the repository passwords cannot exceed 31 characters.
3. If you select Shared Network Folder, enter the Catalog File Location by using the following format:
● NFS share for .XML file—host:/share/filename.xml
● NFS share for .gz file—host:/share/filename.gz
● CIFS share for .XML file—\\host\share\filename.xml
● CIFS share for .gz file—\\host\share\filename.gz
NOTE:
If you configure to use a CIFS share other than Server Message Block (SMB) version 1.0 based CIFS share, it
can cause potential service disruption as OMIVV cannot communicate with such CIFS shares. Hence, it is recommended
that you use SMB version 1.0 based CIFS shares only.
NOTE: If you are using CIFS share, OMIVV prompts you to enter the user name and password. The @, %, and ,
characters are not supported for use in shared network folder user names or passwords.
4. Click Apply after downloading is complete.
NOTE: It might take up to 60 to 90 minutes to read the catalog from the source and update the OMIVV database.
Configuring latest appliance version notification
To receive periodic notification about the availability of latest version (RPM, OVF, RPM/OVF) of OMIVV, perform the following
steps to configure the latest version notification:
28
Appliance configuration for VMware vCenter