
Setup Guide


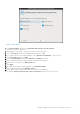
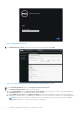
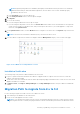
Table Of Contents
- OpenManage Integration for VMware vCenter Quick Install Guide for vSphere Client Version 3.0
- Installing OpenManage Integration for VMware vCenter
- Configuring OpenManage Integration for VMware vCenter
- Configuration Wizard welcome page
- Creating a new Connection Profile [Wizard]
- Configuring Events And Alarms [Wizard]
- Setting Up A Proxy Server [Wizard]
- Scheduling Inventory Jobs [Wizard]
- Running A Warranty Retrieval Job [Wizard]
- Configuring the Deployment Credentials [Wizard]
- Setting The Default Firmware Update Repository [Wizard]
- Enabling The OMSA Link [Wizard]
- Configuring Dell iDRAC Auto-Discovery
- Configuring NFS Shares
- Licensing in OpenManage Integration for VMware vCenter
- More Configuration Information

● Supported servers and minimum BIOS requirements
● Supported iDRAC versions (both deployment and management)
● OMSA support for older servers and ESXi version support (both deployment and management). For more informartion see,
OpenManage Integration for VMware vCenter Compatibility Matrix. available at dell.com/support/manuals
Software Requirements
The vSphere environment must meet virtual appliance, port access, and listening port requirements.
VMware vSphere has both a desktop client and Web client.
● Install Adobe Flash Player 10 or higher on the vSphere client system.
For specific software requirements, see OpenManage Integration for VMware vCenter Compatibility Matrix available at
dell.com/support/manuals
OpenManage Integration for VMware vCenter Port Requirements
Port Console
443 (https) and 80 (http) Administration console
4433 (https) Auto discovery and handshake
162 and 11620 SNMP trap listener
2049, 4001, 4002, 4003, 4004 NFS Share
Installation and Configuration Overview
The following information is an outline of the OMIVV installation process. To begin the actual installation, see Deploying the
OMIVV OVF Using the vSphere Client on page 5.
Installation Overview
1. Install OMIVV.
a. Make sure vCenter server is up and running.
b. Deploy an Open Virtualization Format (OVF) file that contains the OMIVV using the vSphere client.
c. Upload the license file.
d. Register the OMIVV with vCenter server using the Administration Console.
NOTE:
Registering using FQDN (Fully Qualified Domain Name) is not mandatory, but is highly recommended. For
both and IP (Internet Protocol) and FQDN based registrations, the hostname of the vCenter should be properly
resolvable by the DNS server.
2. Complete the steps in the Configuration Wizard.
3. Enable Dell events to set up event filter options on the Settings page
4. Enable firmware updates to download firmware updates, and make them available to applicable systems
5. Configure the Dell iDRAC user name and password.
Deploying the OMIVV OVF Using the vSphere Client
This procedure assumes you have downloaded the zip file from the Dell Web site.
To deploy the OMIVV OVF using the vSphere Client:
1. Unzip the file containing the OMIVV virtual disk, and run setup.exe.
2. Double-click the Setup.exe file to agree to the EULA, extract and obtain the OVF file.
3. Copy/move the OVF file to a location accessible to the VMware vSphere host to which you will upload the appliance.
4. Start the VMware vSphere client.
Installing OpenManage Integration for VMware vCenter
5